

Microwave curing technology revolutionizes how you work with epoxy and composite materials. This method uses electromagnetic waves to heat materials uniformly, ensuring faster and more efficient curing. For instance, microwave curing achieves complete cross-linking in just 10 minutes, compared to 20 minutes with conventional methods. The table below highlights its key benefits:
|
Benefit |
Microwave Curing Time |
Conventional Curing Time |
Notes |
|---|---|---|---|
|
Complete cross-linking |
10 minutes |
20 minutes |
Achieved complete cross-linking faster with microwave heating. |
|
Curing time |
10 minutes |
8 hours |
Significant reduction in curing time. |
|
Interlaminar fracture toughness |
Increased by 66% |
N/A |
Enhanced toughness in composites cured with microwaves. |
Microwave curing also ensures uniform heating throughout the material, unlike traditional methods that often cure only the surface. This uniformity enhances material properties, making your projects stronger and more reliable.
Key Takeaways
-
Microwave curing makes curing faster, finishing in 10 minutes instead of 20.
-
Even heating with microwaves improves material strength and reliability.
-
Prepare well: mix materials fully and use heat-safe molds for best results.
-
Watch the temperature carefully to avoid overheating and ruining the material.
-
Test on small samples and write down good settings for better results every time.
Preparation for Microwave Curing
Materials and Tools for Curing
Essential materials (epoxy, composite materials, molds, etc.)
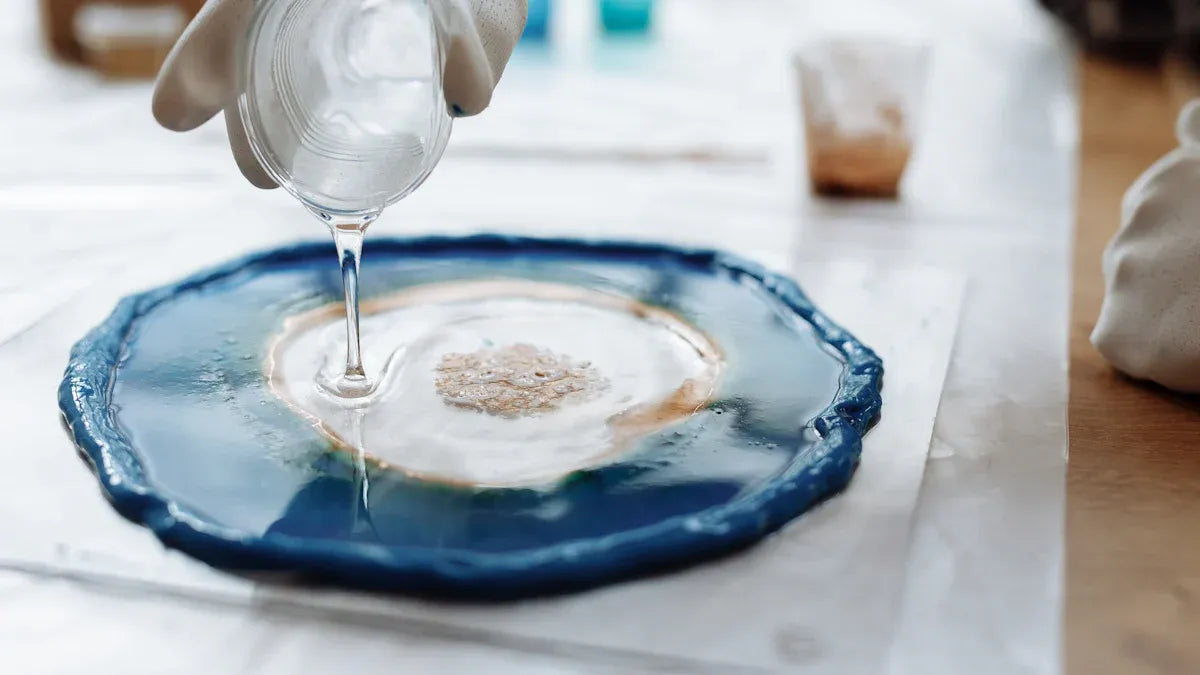
To begin microwave curing, you need the right materials. For epoxy, use bisphenol-A diglycidyl ether (BADGE) as the resin. Pair it with phthalic anhydride (PA) as the curing agent and 2-ethyl-4-methylimidazole (EM) as the accelerator. These components ensure proper polymerization and cross-linking during the curing process. For composite applications, select a carbon fiber laminate with a coating designed to interact effectively with microwaves. Use molds that can withstand high temperatures without deforming. These materials form the foundation for successful curing.
Necessary tools (microwave, thermometer, safety gear, etc.)
Equip yourself with tools that ensure precision and safety. Use a microwave designed for laboratory curing, not a domestic one. A thermometer helps you monitor the temperature to avoid overheating. Safety gear, including gloves, goggles, and a lab coat, protects you from potential hazards. A tool base, such as Invar, provides stability during curing. These tools make the process efficient and safe.
Safety Measures
Importance of protective gear and ventilation
Safety is crucial when working with epoxy and composite materials. Always wear protective gear to shield yourself from harmful fumes and accidental spills. Ensure your workspace has proper ventilation to prevent the buildup of toxic vapors. These precautions protect your health and maintain a safe environment.
Ensuring microwave safety during curing
Operate the microwave with care. Use equipment specifically designed for curing processes. Avoid domestic microwaves, as they lack the necessary safety features. Monitor power and temperature closely to prevent accidents. Be aware of the stability of your materials at high temperatures to avoid hazardous reactions. A knowledgeable operator is the best safety measure.
Workspace Setup
Selecting a suitable microwave for curing
Choose a microwave that meets the demands of curing epoxy and composite materials. Laboratory-grade microwaves offer precise control over temperature and power settings. These features ensure uniform curing and prevent overheating. Avoid using microwaves not designed for curing applications.
Preparing epoxy and composite materials for curing
Prepare your materials carefully. Mix the resin, curing agent, and accelerator thoroughly to achieve a uniform consistency. This step ensures proper curing and enhances the final material properties. Position the materials in molds designed to withstand the curing process. Proper preparation sets the stage for successful results.
Step-by-Step Microwave Curing Process
Mixing and Preparing Materials
Properly mixing epoxy and composite materials
To achieve proper curing, you must mix your materials with precision. Follow these steps to prepare your epoxy and composite materials effectively:
-
Use a clean, dry container made of plastic, metal, or wax-free paper.
-
Measure the resin and hardener accurately according to the manufacturer’s instructions.
-
Mix the components thoroughly for 2-3 minutes, scraping the sides and bottom of the container to ensure uniformity.
-
Conduct a small test batch to familiarize yourself with the process.
-
Avoid altering the mix ratio, as this can disrupt polymerization and lead to improper curing.
Proper mixing ensures the resin and hardener react fully, creating strong cross-linking for durable results.
Ensuring uniform consistency before curing
Uniform consistency is critical for the curing process. After mixing, inspect the material for lumps or unmixed areas. If you notice inconsistencies, continue stirring until the mixture appears smooth and homogeneous. Pour the mixture into your mold immediately to prevent premature setting. This step ensures the epoxy cures evenly, enhancing its performance in applications like structural repairs or composite manufacturing.
Microwave Curing Instructions
Placing materials in the microwave safely
Positioning your materials correctly in the microwave is essential for safety and efficiency. Use molds that can withstand high temperatures without deforming. Place the mold in the center of the microwave to ensure even heat distribution. Avoid overcrowding the microwave, as this can block airflow and lead to uneven curing.
Setting the correct power level and time for curing
Set the microwave to a low power level to prevent overheating. For example, 20 watts is effective for curing epoxy, allowing the material to reach 140°C in just 32 seconds. This power level ensures complete cross-linking within 10 minutes. Monitor the time closely to avoid over-curing, which can damage the material’s properties.
Monitoring and Adjusting During Curing
Checking temperature and consistency
Monitoring the temperature during curing is vital for achieving optimal results. Use a thermometer or thermocouples to measure the internal or surface temperature of the material. Precise control of microwave power allows you to maintain the target temperature, ensuring the curing process proceeds smoothly. Check the material’s consistency periodically to confirm it is curing evenly.
Adjusting microwave settings to avoid overheating
Overheating can compromise the quality of your cured epoxy. Adjust the microwave’s power settings in small increments, such as 10%, to maintain control. For instance, a 10% power setting produces 60 W or 130 W, depending on the microwave’s capacity. This flexibility allows you to fine-tune the curing process and prevent damage to the material.
Finalizing the Curing Process
Allowing materials to cool and set properly
After completing the curing process, you must allow the materials to cool gradually. Rapid cooling can cause warping or internal stress, which may compromise the structural integrity of your epoxy or composite. Place the cured material in a stable environment with a consistent temperature. For most room-temperature epoxy resins, the ideal range is between 22 to 27 degrees Celsius with 20% relative humidity. This ensures proper curing and promotes the development of optimal mechanical properties.
If the curing process is incomplete, consider using a secondary curing method, such as a curing oven, to finalize the cross-linking of the material. This step is especially important for applications requiring high-performance results. For example, o-rings and similar components benefit from gradual cooling to maintain dimensional stability and achieve their desired performance characteristics. Allow the material to cure for at least 24 to 36 hours before handling. In some cases, full polymerization may take up to seven days, depending on the ambient conditions and the type of resin used.
Inspecting cured materials for quality and defects
Once the material has cooled and set, inspect it thoroughly to ensure quality. Look for visible defects such as cracks, bubbles, or uneven surfaces. These issues often indicate improper curing or inconsistent mixing. Use a magnifying glass or other tools to examine the surface closely.
Check the material’s mechanical properties by applying light pressure or performing a small stress test. Proper curing should result in a strong, durable material with no signs of weakness. If you notice defects, identify the root cause and adjust your curing process for future projects. For example, uneven heat distribution or incorrect temperature settings can lead to defects. Addressing these issues ensures your epoxy or composite meets the required standards for its intended applications.
Troubleshooting Issues in Microwave Curing
Addressing Uneven Curing
Causes of uneven heat distribution
Uneven curing often results from inconsistent heat distribution within the microwave. This issue can occur if the material is not centered or if the mold blocks airflow. Microwaves with fixed power settings may also create hot spots, leading to partial curing. The material’s thickness and composition can further affect how heat penetrates, causing some areas to cure faster than others.
Solutions for achieving uniform curing
To ensure uniform curing, you should position the material in the center of the microwave. Use a turntable or manually rotate the mold during the process. This helps distribute heat evenly across the material. Thin, consistent layers of epoxy or resin cure more uniformly than thicker sections. Adjusting the microwave’s power settings and using a thermometer to monitor temperature can also prevent uneven results. For larger applications, consider curing in smaller batches to maintain control over the process.
Preventing Overheating or Burning
Identifying signs of overheating during curing
Overheating can damage the material and compromise its properties. Signs of overheating include discoloration, bubbling, or a burnt smell. You may also notice cracks forming on the surface or a sudden change in the material’s consistency. These indicators suggest that the temperature has exceeded the material’s tolerance.
Adjusting microwave settings to prevent damage
To avoid overheating, start with a low power setting and gradually increase it if needed. Monitor the temperature closely using a thermometer or thermocouples. If you notice signs of overheating, pause the process and allow the material to cool before resuming. Adjust the power level in small increments to maintain control. For sensitive materials, use shorter curing intervals and check the progress frequently.
Avoiding Material Cracking or Weakness
Common reasons for cracking in cured materials
Cracks in cured materials can arise from several factors:
-
Rapid cooling or uneven temperature changes during curing.
-
Incorrect mixing ratios of resin and hardener, disrupting polymerization.
-
Excessive moisture in the environment, which can weaken the material.
-
Structural stress caused by improper mold design or handling.
Cracks in load-bearing applications, such as structural repairs, can compromise integrity. Moisture penetration through cracks may also lead to further deterioration.
Tips to ensure structural integrity
To prevent cracking, mix the resin and hardener accurately and ensure a uniform consistency. Maintain a stable temperature throughout the curing process and avoid rapid cooling. Use molds designed to minimize stress on the material. Regular inspections of cured materials help identify potential issues early. For critical applications, consider reinforcing the material or applying a secondary curing method to enhance durability.
Tips for Proper Curing and Optimal Results
Ensuring Uniform Heat Distribution
Using turntables or manually rotating materials
To achieve uniform curing, you should ensure even heat distribution during the process. Using a turntable in your microwave allows the material to rotate, exposing all sides to consistent heating. If your microwave lacks a turntable, manually rotate the mold at regular intervals. This technique prevents hot spots and ensures the entire material cures evenly.
Microwave curing offers a significant advantage over conventional methods. Unlike surface-only heating in furnaces, microwaves penetrate deeply into the material. This volumetric heating ensures uniform thermosetting throughout, enhancing the quality of your cured epoxy. By rotating the material, you maximize this benefit and avoid uneven results.
Positioning materials correctly in the microwave
Proper placement of materials in the microwave is equally important. Always position the mold in the center of the microwave cavity. This placement ensures the material receives consistent exposure to microwaves, reducing the risk of uneven curing. Avoid stacking or overcrowding the microwave, as this can block airflow and disrupt heat distribution.
Selecting the Right Microwave Settings
Recommended power levels for epoxy and composites
Choosing the correct power level is crucial for effective curing. For most epoxy systems, a low power setting, such as 20 watts, works well. This setting allows the material to reach the desired temperature gradually, preventing overheating. For composites, you may need to adjust the power level based on the material’s thickness and composition. Always refer to the manufacturer’s guidelines for optimal results.
Importance of gradual heating for proper curing
Gradual heating plays a vital role in achieving full polymerization. Start by curing the resin at room temperature for 18 to 24 hours. Then, apply heat at 220°F to 250°F for 45 minutes to an hour. This two-step process enhances the mechanical properties of the material, making it suitable for demanding applications. Gradual heating also minimizes the risk of defects like cracking or warping, ensuring the cured material meets high-performance standards.
Experimentation and Record-Keeping
Conducting small-scale tests before full curing
Small-scale tests are an excellent way to refine your curing techniques. These tests help you understand how the material reacts to microwave curing temperatures. They also allow you to assess the impact of hydration and heat on the material’s performance. By starting small, you can identify potential issues and make adjustments before scaling up. This approach ensures better results and reduces waste.
Documenting successful settings and methods for future use
Keeping detailed records of your curing process is essential for consistency. Document the microwave settings, curing times, and temperatures that yield the best results. This information helps you replicate successful outcomes in future projects. It also provides valuable insights into how specific parameters affect the material’s strength and bonding properties. Over time, these records become a valuable resource for optimizing your curing process.
Microwave curing technology offers numerous advantages for epoxy and composites. It significantly reduces curing time, ensures uniform heating, and enhances material properties. For example, microwaves can achieve complete cross-linking in just 10 minutes, compared to 20 minutes with conventional methods. The table below highlights key takeaways:
|
Aspect |
Microwave Curing |
Conventional Heating |
|---|---|---|
|
Curing Time |
10 minutes for complete cross-linking |
20 minutes for incomplete cross-linking |
|
Heating Method |
Selective heating of materials |
Radiant heat affecting only surface |
|
Temperature Reach Time |
32 seconds to 140°C |
81 seconds to 140°C |
|
Uniformity of Curing |
Uniform reaction |
Non-uniform reaction |
|
Mechanical Properties |
Similar to conventional methods |
Similar to microwave methods |
Proper preparation, monitoring, and troubleshooting are essential for successful curing. Using suitable molds and temperature monitoring tools ensures precise control. Real-time adjustments during curing prevent defects, while understanding material-specific requirements improves troubleshooting.
Experimentation allows you to refine your process for better results. For instance, curing materials with carbon nanotubes in a microwave takes only 10 minutes, compared to eight hours in an oven. This efficiency, combined with volumetric heating, reduces energy consumption and enhances control over curing temperatures. By experimenting and documenting your findings, you can optimize your process and achieve consistent, high-quality outcomes.
Embrace microwave curing to save time, improve efficiency, and elevate the quality of your projects. With proper preparation and a willingness to experiment, you can unlock the full potential of this innovative technology.


Share:
Discover the Lightest M4 CSL Parts Today
A Guide to Choosing the Best Autonomous Sensor-Compatible Parts