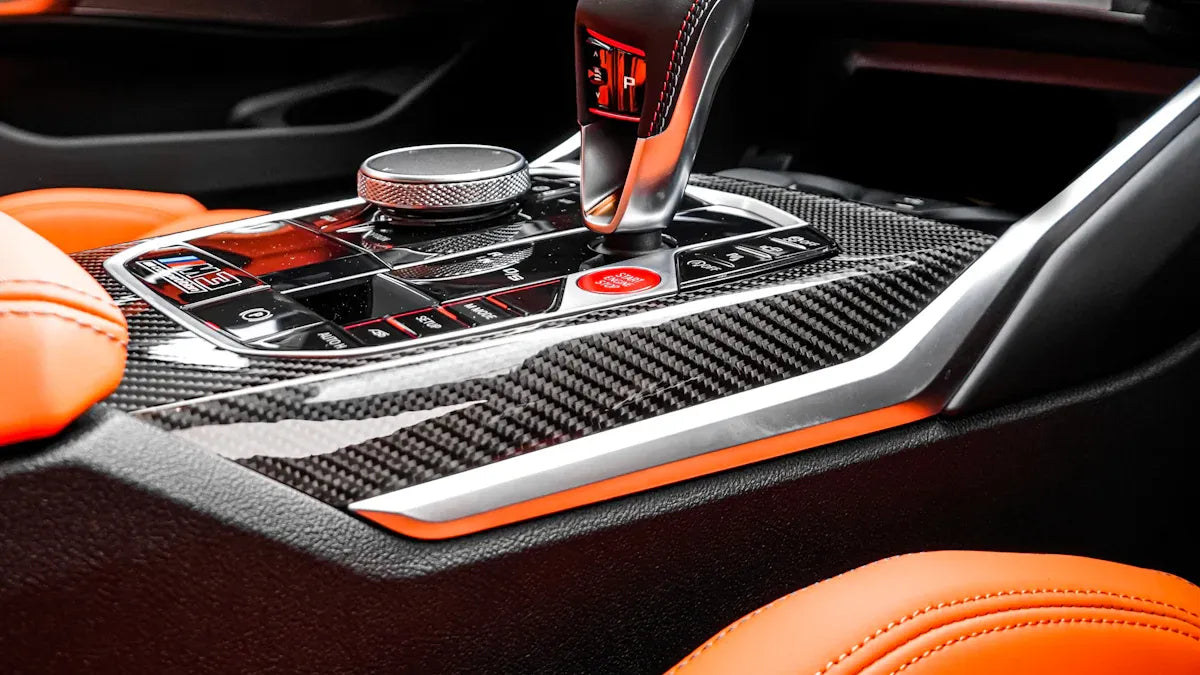
Transforming your BMW’s interior has never been easier with BMW ambient lighting with carbon trim. Adding these ambient lights not only upgrades the look of your car but also enhances your driving experience. You’ll love how the soft glow from the BMW ambient lighting elevates the ambiance, making every ride feel luxurious. Plus, the functional design ensures you can enjoy this upgrade without sacrificing practicality. The best part? This installation is simple enough for DIY enthusiasts. With just a few basic tools and a little patience, you can give your car a sleek, modern touch that stands out.
Key Takeaways
-
Gather all tools and materials before you begin. Being ready saves time and makes the job easier.
-
Check if the lighting kit and carbon trim fit your BMW model. Using original parts ensures they work well together.
-
Install step by step. Take off old trim carefully, place the lights, and secure them for a neat finish.
-
Test the lights after installing to make sure they work. Change brightness and colors to suit your style.
-
Hide wires neatly to keep the car looking clean. Use ties and sticky clips to hold wires in place.
Preparation for BMW Ambient Lighting Installation
Getting ready for your BMW ambient lighting with carbon trim installation is just as important as the installation itself. A little preparation goes a long way in ensuring a smooth process. Let’s break it down step by step.
Tools and Materials Needed
Before you start, gather all the tools and materials you’ll need. Having everything on hand will save you time and frustration.
Essential tools
Here’s a list of tools you’ll want to have ready:
-
Screwdrivers (flathead and Phillips)
-
T20 Torx bit
-
Plastic pry tool
-
Solid pry tool
-
Small slotted screwdrivers
-
Ratchet set
-
Zip ties
-
Masking tape
-
Electrical tape or heat shrink tubing
-
Hot glue gun
-
A lighter
-
A needle
Required materials
You’ll also need the following materials for the job:
-
Ambient lighting kit (including LED lights and 3mm optical cables)
-
Carbon trim pieces
-
Adhesive or clips
-
Door handle opener trim (e.g., part numbers 51417274489 and 51417274490)
-
LED modules for doors and center console
-
Socket terminals and housings for wiring
Having these items ready will make the process much easier and more efficient.
Ensuring Compatibility
Not all ambient lighting kits and carbon trims are created equal. You’ll need to make sure everything fits your BMW model, whether it’s a G20 or another series.
Verify the ambient lighting kit matches your BMW model
Check that the kit you’ve purchased is compatible with your car. Using OEM parts is a great way to ensure seamless integration. Ambient lights in BMWs are managed through the Front Electronics Module (FEM), so make sure the kit works with this system.
Confirm the carbon trim fits your car’s interior design
Double-check that the carbon trim matches your car’s interior layout. This ensures a clean and professional look once installed.
Setting Up Your Workspace
A well-organized workspace can make the installation process much smoother. Here’s how to set up your area for success.
Clean and prepare the interior surfaces
Start by cleaning the surfaces where you’ll install the lighting and trim. Use a gentle cleaner to remove dust and grease. This helps the adhesive stick better and ensures a polished finish.
Organize tools and materials for easy access
Lay out your tools and materials in an organized manner. Keep everything within reach so you don’t waste time searching for items. You might also want to use a small bungee cord or masking tape to keep wires and tools in place while you work.
By following these steps, you’ll be fully prepared to transform your BMW’s interior with ambient lights and carbon trim.
Step-by-Step Ambient Light Installation
Removing Existing Trim
Removing the existing trim is the first step in your ambient light installation. This part requires patience and care to avoid damaging your car’s interior.
Use trim removal tools to detach current trim carefully.
Start by using a plastic pry tool to gently lift the edges of the trim. Some parts, like the dashboard or door panels, might be tricky to remove. Take your time and work slowly to avoid snapping any clips. If a piece feels stuck, try repositioning your tool or applying light pressure to release it.
Avoid damaging clips or connectors during removal.
Be cautious when handling clips and connectors. These are delicate and can break easily. Once you’ve removed a piece, connect the new part temporarily to test its fit and functionality before proceeding. This ensures everything works as expected and saves you from redoing the work later.
Tip: Keep all removed clips and screws in a small container to avoid losing them during the process.
Installing the Ambient Lighting
Now it’s time to bring your BMW’s interior to life with ambient lights. Follow these steps to position and connect the LED lights properly.
Position lighting strips along desired areas (e.g., dashboard, doors).
Decide where you want the lighting strips to go. Popular spots include the dashboard, door panels, and center console. Use masking tape to temporarily hold the strips in place while you adjust their alignment. This helps you visualize the final look before securing them.
Secure strips with adhesive or clips from the kit.
Once you’re happy with the placement, use the adhesive backing or clips provided in the kit to secure the strips. Press firmly to ensure they stick well. For areas with curves, take extra care to smooth out the strips for a seamless appearance.
Connect lighting to the car’s power source as per instructions.
Before connecting the lights, disconnect your car’s battery to prevent electrical issues. Route the wires through the door jamb using a snake tool for a clean installation. Connect the supply wires to the trunk release switch for proper dimming functionality. Wrap all connections in textile tape to keep them secure and tidy.
Attaching the Carbon Trim
The final step is attaching the carbon trim to complete the sleek look of your BMW’s interior.
Align carbon trim with lighting strips for a seamless look.
Carefully align the carbon trim pieces over the installed lighting strips. Make sure the trim fits snugly and doesn’t block the light. Adjust as needed to achieve a polished, professional finish.
Secure trim using adhesive or screws, depending on the design.
Use adhesive or screws, depending on the trim’s design, to secure it in place. Apply even pressure to ensure the trim adheres properly. Double-check that all edges are flush with the surrounding surfaces for a clean and cohesive look.
Note: Test the ambient lights again after attaching the trim to confirm everything works perfectly.
Testing the Installation
Once you’ve installed the ambient lights and carbon trim, it’s time to test everything. This step ensures your hard work pays off and the lights function as intended. Follow these simple steps to check and fine-tune your setup.
Turn on the car and test the ambient lighting.
Start by turning on your car to power up the ambient lights. Look closely at each area where you’ve installed the lights, like the dashboard, doors, and center console. Check for consistent brightness and ensure there are no flickering or dim spots. If you notice any issues, double-check the connections and make sure the strips are securely in place.
Tip: If the lights don’t turn on, inspect the power connections and fuses. Sometimes, a loose wire or an incompatible kit can cause problems. Revisit the installation instruction manual to troubleshoot effectively.
Adjust brightness or color settings as needed.
Now comes the fun part—customizing the lights to match your style! Most BMW models allow you to control the brightness and colors through the car’s infotainment system or a dedicated app. Here’s how you can tweak the settings:
-
Use the control panel to navigate to the ambient lighting menu.
-
Experiment with different brightness levels to find what feels right. A softer glow works well for nighttime driving, while brighter settings can enhance visibility during the day.
-
Choose your favorite colors. Many kits offer a range of options, from calming blues to vibrant reds.
For advanced customization, you can replace the installed LEDs with new ones in your desired colors. Use a T20 Torx bit and small screwdrivers to access the light housings. If you’re tech-savvy, you can even adjust the color data through the BDC3 module. Plan your color combinations in hexadecimal format (e.g., FF0000 for red) before starting the coding process.
Note: Keep in mind that some BMW models automatically change ambient lighting colors based on driving modes. For example, switching to Sport mode might turn the lights red or dark blue. If this isn’t your preference, you can override these settings through the control system.
Testing and adjusting your ambient lights ensures they look great and function perfectly. Take your time to explore all the options and create a setup that feels uniquely yours.
Finishing Touches and Customization
Organizing and Concealing Wires
After installing the ambient lights, you’ll want to tidy up the wires for a clean and professional look. Exposed wires can ruin the aesthetic and might interfere with your car’s functions. Here’s how you can organize and conceal them effectively:
-
Bundle the wires neatly: Use cable ties or cord bundlers to group wires together. This keeps them from tangling and makes them easier to manage.
-
Hide wires behind panels: Tuck the wires behind the dashboard or door panels. Use adhesive-backed cord bundlers to secure them in place.
-
Use a cable management box: If you have extra wiring near the power source, stash it in a small cable management box. These boxes have slits for running cords and keep everything out of sight.
Tip: Make sure the wires don’t block any moving parts or interfere with controls like the door locks or window switches.
Customizing the Lighting
Now comes the fun part—making the lighting uniquely yours! BMW ambient lighting with carbon trim offers plenty of customization options to match your style. You can adjust the brightness, change colors, or even sync the lights with your music or driving modes. Here’s a quick overview of popular features:
|
Feature |
Description |
|---|---|
|
DIY Modes |
Choose from 16 million colors and adjust brightness through a smart app. |
|
Scenario Modes |
Enjoy 28 dynamic modes like flash, jump, and fade for different vibes. |
|
Dynamic Music Sync |
Let the lights dance to your favorite tunes for an immersive experience. |
|
Control Methods |
Use a remote, control box, or Bluetooth app for easy adjustments. |
Experiment with these features to create the perfect ambiance for your G20 or other BMW models. Whether you prefer a calming blue glow or vibrant red for Sport mode, the choice is yours.
Final Inspection
Before wrapping up, take a moment to inspect your work. This ensures everything is securely installed and functioning as it should. Follow these steps for a thorough check:
-
Verify that all trim pieces are firmly attached and aligned with the lighting strips.
-
Test the ambient lights again. Check for consistent brightness and ensure there are no flickering or dim spots.
-
Inspect the wiring. Make sure all cables are hidden and don’t interfere with any car functions.
-
Adjust any loose components. If something feels off, revisit the installation instruction to fix it.
Note: A final walkthrough helps you catch any small issues before hitting the road. Take your time to ensure everything looks and works perfectly.
With these finishing touches, your BMW’s interior will look sleek and modern. You’ve successfully transformed your car into a luxurious space that reflects your personal style.
Troubleshooting Ambient Light Installation Issues
Even with careful planning, you might run into a few hiccups during your ambient light installation. Don’t worry—most issues are easy to fix with a little troubleshooting. Let’s tackle some common problems and how you can resolve them.
Lighting Does Not Work
If your ambient lights don’t turn on, start by checking the basics.
Check power connections and fuses.
Loose or incorrect connections are often the culprit. Double-check that all wires are securely connected to the power source. If the lights still don’t work, inspect the fuses related to the lighting system. For example, one user found that their lights weren’t working in all four doors, even though other lights were fine. They resolved the issue by replacing a blown fuse. If you suspect a failure in the front panel or LED module, consider consulting a professional.
Ensure compatibility with your car’s electrical system.
Not all kits work seamlessly with every BMW model. Make sure the kit you’ve installed is compatible with your car’s electrical system. For instance, the G20 uses a Front Electronics Module (FEM) to manage ambient lights. If the kit isn’t designed for this system, it might not function properly.
Uneven Lighting or Gaps
Uneven lighting can ruin the sleek look you’re aiming for. Luckily, it’s easy to fix.
Reposition lighting strips for better alignment.
Take a step back and check the placement of your lighting strips. If they look uneven, reposition them carefully. Use masking tape to hold them temporarily while you adjust their alignment.
Use additional adhesive if necessary.
If the strips don’t stay in place, try a stronger adhesive. High-quality 3M tapes are a popular choice for their durability and ease of use. For textured surfaces, consider Tesa adhesives, while Gorilla Glue works well on smooth areas. If you’re looking for a non-permanent solution, Command Strips can also do the trick.
Carbon Trim Fit Issues
Sometimes, the carbon trim might not fit perfectly. Here’s how you can address this.
Verify trim compatibility with your BMW model.
Before installation, double-check that the trim matches your car’s interior design. For example, the G20 has specific dimensions that require precise trim pieces. Using incompatible trim can lead to gaps or misalignment.
Carefully adjust or trim carbon pieces if needed.
If the trim doesn’t fit snugly, you can make minor adjustments. Use a fine file or sandpaper to carefully trim the edges. Take your time to avoid overcutting, as this could damage the piece. Once adjusted, test the fit again before securing it in place.
By addressing these common issues, you’ll ensure your BMW’s ambient lights and carbon trim look flawless. Troubleshooting might take a little extra time, but the results are worth it.
Adding BMW ambient lighting with carbon trim transforms your car’s interior into a luxurious and personalized space. The process is straightforward when you break it down step by step. First, remove the existing trim and carefully slide in the ambient lights until they click. For door handle lights, detach the rear door cards and insert the lighting modules without damaging the optical plastic light tube. Next, create wiring harnesses, feed the wires through the rubber boot, and secure them in the correct pins. Finally, reattach everything and test your setup.
With proper preparation and patience, you can handle this installation like a pro. The result is a sleek, modern interior that reflects your unique style. So, why not take the leap and give your BMW the upgrade it deserves?


Share:
The Sustainability Drive Behind BMW’s Bio-Based Materials
Best BMW M leather and carbon steering wheels of 2025