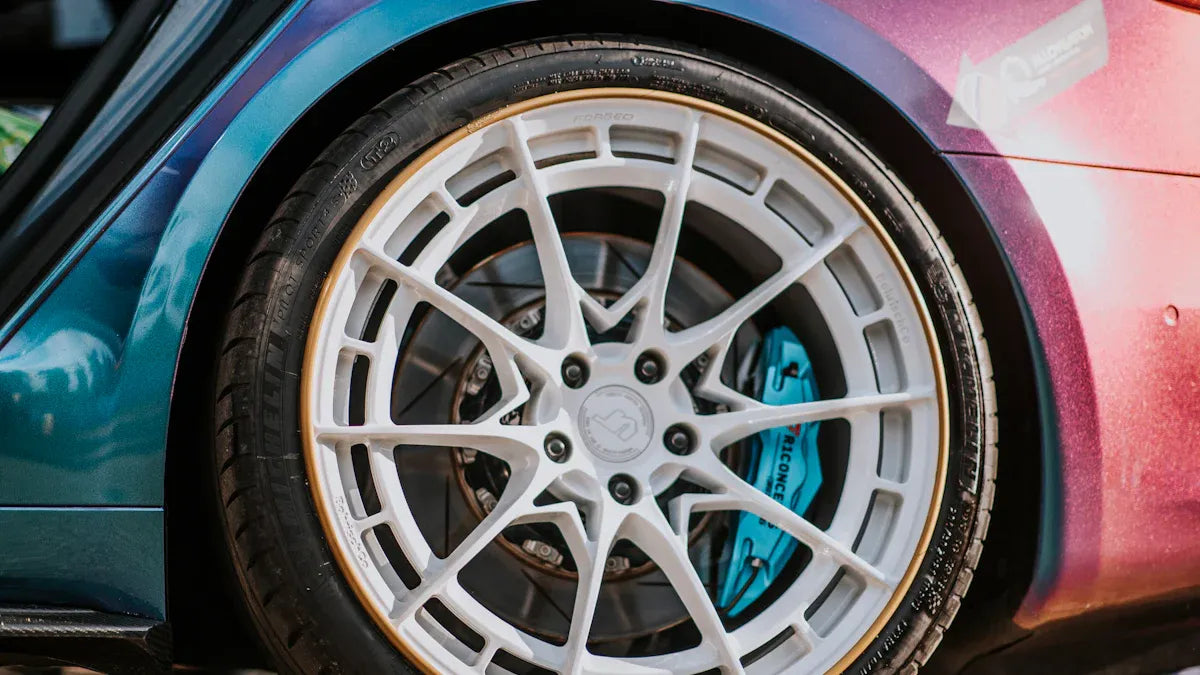

Rim restoration enhances your car’s appearance and ensures its wheels function optimally. Refurbishing car rims yourself saves money and gives you the satisfaction of transforming them. With the right tools and guidance, even beginners can achieve impressive results. DIY restoration also helps you understand how to maintain car rims, preventing future damage.
Key Takeaways
-
Fixing car rims makes them look better and work well. It’s a cheaper way to upgrade your car.
-
Use proper tools like good primer and paint. This gives a neat look and keeps rims safe.
-
Clean rims often and add protective layers. This keeps them in good shape and lasts longer.
Tools and Materials for Rim Restoration
Essential tools for wheel restoration
To achieve a successful wheel restoration, you need the right tools. Start with a jack stand to safely lift your car and remove the wheels. A cordless drill and a 4-in-1 screwdriver will help you disassemble components efficiently. Sandpaper is crucial for smoothing out imperfections, while a shop vacuum ensures the work area stays clean. Protect yourself with safety glasses and a dust mask to avoid inhaling particles during sanding.
For more advanced repairs, consider using specialized equipment like wheel repair lathes or CNC wheel refurbishment machines. These tools provide precision and consistency, especially for professional restoration projects. If you’re dealing with bent or misaligned rims, a wheel straightening machine can restore their shape and ensure safety.
Tip: Investing in high-quality tools not only improves results but also saves time and effort during rim restoration.
Recommended materials for a professional finish
Using the right materials is essential for achieving a polished and durable finish. Start with a high-quality primer to create a smooth base for the paint. Choose a plastic-rated metallic spray paint or wheel paint for the color coat. A clear coat spray is vital for protecting the paint and adding a glossy finish.
For a truly professional restoration, use a specialized rim polish to enhance the shine. Apply it with a soft cloth after the clear coat has dried. These materials ensure your rims look as good as new and remain protected from future damage.
Note: Always check the compatibility of the primer, paint, and clear coat to avoid peeling or cracking over time.
Assessing Rim Damage Before Starting
Identifying scratches, dents, and corrosion
Before beginning rim restoration, you need to carefully inspect your rims for visible damage. Scratches often appear as surface-level imperfections caused by road debris or improper handling. Dents, on the other hand, result from impacts with curbs or potholes and can compromise the rim’s structural integrity. Corrosion typically manifests as rust or discoloration, especially on older rims exposed to moisture and road salt.
To identify these types of damage accurately, you can rely on both visual inspection and advanced diagnostic methods. For example, sound analysis techniques, such as interval-valued fuzzy inference, provide reliable data for assessing damage severity. The table below highlights the key features of this method:
|
Method Description |
Key Features |
Results |
|---|---|---|
|
Interval-valued fuzzy inference-based sound analysis |
Utilizes fuzzy sets to represent damage levels, similarity calculation for damage assessment, OWA operator for feature weighting |
Outperforms existing techniques in detection accuracy, response speed, and robustness. |
Tip: Use a flashlight to examine hard-to-see areas and ensure no damage goes unnoticed.
Determining the extent of repairs needed
Once you’ve identified the types of damage, evaluate their severity to determine the necessary repair steps. Minor scratches can often be resolved with sanding and polishing. Dents may require more intensive techniques, such as reshaping or welding, depending on their depth. Corrosion might need chemical treatments or complete removal of affected areas.
Assessing the extent of damage helps you plan your rim restoration process effectively. For severe issues, consider consulting a professional to ensure safety and durability.
Step 1: Removing the Wheel for Restoration
How to safely remove the wheel
Removing the wheel is the first step in rim restoration. Start by parking your car on a flat, stable surface. Engage the parking brake to prevent movement. Use a lug wrench to loosen the lug nuts slightly while the wheel is still on the ground. This step ensures the nuts are easier to remove once the car is lifted.
Next, position a jack under the car’s designated lifting point, typically outlined in the owner’s manual. Slowly raise the car until the wheel is off the ground. Place a jack stand under the car for added stability. Once the car is secure, fully remove the loosened lug nuts and carefully take off the wheel. Avoid using excessive force to prevent damage to the wheel or surrounding components.
Tip: Always keep the lug nuts in a safe place to avoid losing them during the process.
Tips for securing the car during the process
Securing the car is crucial for your safety. Use wheel chocks to block the tires that remain on the ground. This prevents the car from rolling while you work. Double-check that the jack stand is positioned correctly and can support the car’s weight.
Proper handling techniques also reduce the risk of injury when lifting heavy wheels. Maintain a straight back and bend your knees to lift the wheel safely. If the wheel is too heavy, use a trolley or similar equipment to move it. The table below outlines key safety protocols:
|
Safety Protocols |
Description |
|---|---|
|
Proper Manual Handling Techniques |
Emphasizes maintaining correct posture to avoid injuries while lifting. |
|
Use of Equipment |
Recommends trolleys or tools to assist in lifting and moving heavy objects. |
|
Implementation of Safety Measures |
Focuses on mitigating risks like musculoskeletal disorders and injuries. |
Following these steps ensures a safe and efficient start to your rim restoration project.
Step 2: Protecting the Tire During Rim Restoration
Using tape or tire protectors effectively
Protecting the tire is a crucial step in rim restoration. It prevents paint, primer, or other materials from accidentally spilling onto the tire, ensuring a clean and professional outcome. Automotive masking tape is one of the most effective tools for this purpose. Wrap the tape around the edge of the tire where it meets the rim. This creates a barrier that shields the tire from any overspray or drips during the restoration process.
For added protection, you can use tire protectors. These are specially designed covers that fit snugly over the tire, leaving only the rim exposed. They are reusable and provide full coverage, making them an excellent choice for those who frequently work on rims. If you don’t have access to tire protectors, a combination of masking tape and plastic sheeting can also work effectively.
Tip: Ensure the tape adheres firmly to the tire to prevent gaps where paint might seep through.
Why this step ensures a clean finish
Skipping this step can lead to paint or primer smudges on the tire, which can be difficult to remove and may ruin the overall appearance of your work. By protecting the tire, you maintain a sharp contrast between the rim and the rubber, enhancing the visual appeal of your restoration. This step also saves time by eliminating the need for additional cleanup.
A clean finish not only improves aesthetics but also reflects the quality of your rim restoration efforts. Taking the time to protect the tire ensures that your hard work results in a professional and polished look.
Step 3: Sanding the Rim to Remove Imperfections
Choosing the right sandpaper grit
Selecting the correct sandpaper grit is essential for effective rim restoration. Different grits serve specific purposes, so understanding their uses will help you achieve the best results:
-
Coarse Grits (40 to 60): These are ideal for removing old paint, rust, or rough edges quickly. Use them for heavy-duty sanding tasks.
-
Medium Grits (80 to 120): These work well for smoothing surfaces after using coarse grit. They are also effective for eliminating light scratches.
-
Fine Grits (150 to 180): Use these for final sanding before applying primer or paint. They ensure the surface is smooth and ready for finishing.
-
Very Fine Grits (220 to 240): These are excellent for polishing and creating a refined surface, especially in automotive work.
-
Extra Fine Grits (320 to 400): These grits are perfect for ultra-smooth finishes and polishing tasks, ensuring a flawless look.
Tip: Start with a coarser grit for significant imperfections and gradually move to finer grits for a polished finish. This progression ensures a smooth surface without over-sanding.
Techniques for sanding scratches and corrosion
Proper sanding techniques are crucial for removing imperfections and preparing the rim for the next steps. Begin by holding the sandpaper firmly and applying even pressure. Use circular motions to sand scratches and corrosion, as this method prevents uneven surfaces. For deeper imperfections, start with coarse grit and gradually transition to finer grits to smooth the area.
When dealing with corrosion, focus on removing all rust to prevent it from spreading. A poorly sanded surface can lead to visible defects in the final finish, reducing the quality of your rim restoration. Additionally, an uneven surface may compromise the durability of the coating, leading to earlier wear and tear.
Note: Always clean the rim between sanding stages to remove dust and debris. This step ensures better adhesion for primer and paint.
By choosing the right sandpaper grit and using proper sanding techniques, you can eliminate imperfections effectively. This step lays the foundation for a professional and durable finish.
Step 4: Cleaning the Rim Thoroughly
Best cleaning solutions for rims
Cleaning the rim is a critical step in rim restoration. It ensures that the surface is free of dirt, grease, and debris, which can interfere with the adhesion of primer and paint. You should choose a cleaning solution specifically designed for automotive rims. These cleaners are formulated to break down stubborn grime without damaging the metal or finish.
For light cleaning, a mixture of warm water and mild dish soap works well. Use a soft-bristled brush to scrub the surface gently. For tougher stains, such as brake dust or grease, opt for a commercial wheel cleaner. Acid-free cleaners are ideal because they effectively remove contaminants without corroding the rim. If your rims have significant corrosion, a rust remover may be necessary to restore the surface.
Tip: Avoid using abrasive cleaners or steel wool, as they can scratch the rim and compromise the final finish.
Ensuring the rim is clean and dry before proceeding
After cleaning, rinse the rim thoroughly with clean water to remove any residue from the cleaning solution. Use a microfiber cloth to dry the surface completely. Moisture left on the rim can cause issues during the priming and painting stages, such as uneven application or bubbling.
Inspect the rim closely to ensure no dirt or grease remains. Pay special attention to crevices and edges, as these areas often trap debris. A clean and dry rim provides the perfect foundation for the next steps in rim restoration, ensuring a smooth and professional finish.
Note: Skipping this step can lead to poor adhesion of primer and paint, reducing the durability of your restoration work.
Step 5: Applying Primer for a Smooth Base
Why primer is essential for rim restoration
Primer plays a critical role in rim restoration. It creates a protective layer that shields the metal from corrosion and environmental damage. Without primer, the paint may fail to adhere properly, leading to peeling or cracking over time. By sealing the surface, primer ensures a smooth and consistent base for paint application, which is essential for achieving a professional finish.
Experts highlight that primer enhances the durability of the paint job, making it resistant to wear and tear caused by road debris and weather conditions. This step also contributes to the longevity of your rims, reducing the need for frequent touch-ups or repairs. Skipping primer can compromise the quality of your restoration, leaving the rims vulnerable to damage and diminishing their aesthetic appeal.
Tips for applying primer evenly
Applying primer evenly requires precision and attention to detail. Start by shaking the primer can thoroughly to ensure the contents are well-mixed. Hold the can approximately 8-10 inches away from the rim and spray in smooth, sweeping motions. Avoid lingering in one spot, as this can cause uneven coverage or pooling.
For best results, apply multiple thin coats rather than a single thick layer. Allow each coat to dry completely before applying the next. This technique prevents drips and ensures a uniform finish. Use painter’s tape to mask off areas you don’t want to cover, such as the tire or valve stem.
Inspect the rim after each coat to confirm even coverage. If you notice any missed spots or inconsistencies, lightly sand the area and reapply primer. Following these steps ensures a flawless base for the next stage of rim restoration.
Tip: Work in a well-ventilated area to avoid inhaling fumes and ensure the primer dries efficiently.
Step 6: Painting the Rim for a Fresh Look
Selecting the right paint for car rims
Choosing the right paint is essential for achieving a durable and visually appealing finish during rim restoration. Automotive-grade paints, such as metallic or acrylic enamel, are specifically designed to withstand harsh conditions like road debris, UV rays, and moisture. These paints provide excellent adhesion and resist chipping, ensuring your rims maintain their fresh look for longer.
Professional restyling isn’t just about giving your car a fresh look; it plays a significant role in extending your vehicle’s life. When experts rework the exterior, they often apply protective coatings and treatments that shield against rust, scratches, and sun damage.
A good paint job does more than just make your car look brand new. It protects the body from rust and corrosion.
For an even more durable option, consider ceramic-based paints or coatings. These products chemically bond to the rim’s surface, forming a protective layer that resists wear and tear. This choice not only enhances the aesthetic appeal but also extends the lifespan of your rims.
How to apply paint in thin, even coats
Proper application techniques are crucial for achieving a professional finish. Start by shaking the paint can thoroughly to mix the contents. Hold the can 8-10 inches away from the rim and spray in smooth, sweeping motions. Avoid focusing on one area for too long, as this can cause drips or uneven coverage.
Studies indicate that powder coating significantly enhances the durability and finish of car rims compared to traditional painting methods. It offers exceptional durability, corrosion resistance, and a visually appealing finish that lasts longer. Unlike traditional paint, which can chip or flake, powder coating creates a strong bond with the metal surface, ensuring a finish that withstands elements and wear.
Apply multiple thin coats rather than a single thick layer. Allow each coat to dry completely before applying the next. This method ensures even coverage and prevents imperfections. For best results, work in a well-ventilated area to promote faster drying and avoid inhaling fumes.
Tip: Use painter’s tape to mask off areas you don’t want to paint, such as the tire or valve stem, for a clean and professional result.
Step 7: Adding a Clear Coat for Durability
Benefits of a clear coat for rim protection
Applying a clear coat is a vital step in rim restoration. It acts as a protective barrier, shielding the rims from environmental damage, road debris, and harmful UV rays. A high-quality automotive clear coat enhances the durability of the paint job, ensuring the rims maintain their fresh appearance for an extended period.
Professional-grade clear coats offer several advantages:
-
They block 100% of UV exposure, preventing the paint from fading or discoloring.
-
Their hydrophobic properties repel water, reducing the risk of corrosion.
-
They minimize light scratches and prevent sticky substances like tree sap or bird droppings from adhering to the surface.
For even greater protection, some car owners opt for paint protection films. These films eliminate swirl marks, maintain a high-gloss finish, and safeguard the factory clear coat. While not always necessary, they provide an additional layer of defense for rims exposed to harsh conditions.
How to apply the clear coat for a professional finish
To achieve a flawless finish, you must apply the clear coat with precision. Begin by shaking the can thoroughly to mix the contents. Hold the can 8-10 inches away from the rim and spray in smooth, even strokes. Avoid lingering in one spot to prevent pooling or uneven coverage.
Apply multiple thin coats, allowing each layer to dry completely before adding the next. This technique ensures a uniform finish and enhances the durability of the coating. Work in a well-ventilated area to promote faster drying and avoid inhaling fumes.
Inspect the rim after the final coat to ensure complete coverage. If you notice any imperfections, lightly sand the area with fine-grit sandpaper and reapply the clear coat. This attention to detail guarantees a professional and long-lasting result.
Tip: Use painter’s tape to mask off areas you don’t want to coat, such as the tire or valve stem, for a clean and polished look.
Step 8: Refitting the Tire After Rim Restoration
Safely removing protective materials
After completing the painting and clear coating process, carefully remove any protective materials from the tire. Begin by peeling off the masking tape or removing the tire protector. Work slowly to avoid damaging the fresh paint or leaving adhesive residue on the rim. If you used plastic sheeting, ensure no fragments remain stuck to the rim or tire.
Inspect the rim closely for any overspray or imperfections. If you notice minor paint smudges on the tire, clean them with a soft cloth and a mild solvent. Avoid using abrasive tools or harsh chemicals, as they can damage the tire or compromise the finish of your rim restoration.
Tip: Allow the paint and clear coat to cure fully before removing protective materials. This ensures the finish remains intact during the process.
Reattaching the wheel to your car
Reattaching the wheel requires precision and adherence to safety guidelines. Start by aligning the wheel with the hub and carefully placing it back onto the car. Insert the lug nuts and tighten them by hand in a star pattern to ensure even pressure.
Lower the car slowly using the jack, allowing the wheel to make contact with the ground. Once the car is stable, use a torque wrench to tighten the lug nuts to the manufacturer’s recommended specifications. This step ensures the wheel is securely attached and prevents uneven wear or potential accidents.
If the tire was repaired during the rim restoration process, ensure it was done using a combination repair method. This approach involves sealing the puncture from the inside with a patch and filling it with a rubber stem. It is the safest and most effective way to repair a tire, as it prevents air leaks and moisture intrusion, ensuring long-term durability.
Note: Double-check the lug nuts after driving a short distance to confirm they remain tight.
Step 9: Polishing the Rim for a Professional Finish
How to polish the rim for added shine
Polishing is the final touch in rim restoration, giving your rims a sleek, professional appearance. Start by selecting the right tools and materials. Use a soft cloth wheel for delicate metals or a more robust polishing tool for harder surfaces. Apply a dime-sized amount of polishing compound to a small section of the rim. Test the compound on a hidden area first to ensure compatibility with the material.
Work in circular motions, focusing on one section at a time. This technique ensures consistent shine and prevents swirl marks. Apply light to moderate pressure and begin with low speeds if using a power tool. Over-polishing can damage the surface, so inspect the rim regularly to know when to stop. Clean the buffing pads frequently to avoid scratches caused by residue buildup.
For stubborn imperfections, consider using a clay bar treatment to remove baked-on brake dust or a liquid paint cleaner like Meguiar’s Ultimate Compound to eliminate surface swirls. Waxing the rim after polishing adds temporary protection and enhances the finish. Always polish in a shaded area to maintain control and achieve a smooth, even result.
Tip: Follow a proper grit progression during earlier steps to ensure the rim is smooth and free of visible scratches before polishing.
Final inspection to ensure a flawless result
After polishing, inspect the rim under good lighting to identify any missed spots or imperfections. Look for areas where the shine may be uneven or where residue might remain. Use a microfiber cloth to buff the surface gently, enhancing the gloss and removing any leftover polishing compound.
Check the edges and crevices of the rim, as these areas often trap dirt or compound. If you notice any imperfections, address them immediately to maintain the professional finish. A clear coating applied earlier should already provide protection, but a final inspection ensures the rim restoration process is complete.
Note: Avoid touching the polished surface with bare hands, as oils from your skin can dull the finish. Use gloves or a clean cloth when handling the rim.
How to Maintain Car Rims After Restoration
Regular cleaning and protective measures
Regular cleaning is essential to keep your rims looking their best after rim restoration. Use a non-abrasive wheel cleaner to remove dirt, brake dust, and grime. A soft-bristled brush works well for scrubbing hard-to-reach areas without scratching the surface. Rinse thoroughly with clean water and dry with a microfiber cloth to prevent water spots.
Applying a protective coating can further enhance durability. Products like ceramic coatings or wheel wax create a barrier against road debris, moisture, and UV rays. These coatings also make future cleaning easier by repelling dirt and grime. Reapply the protective layer every few months to maintain its effectiveness.
Tip: Avoid using harsh chemicals or abrasive tools during cleaning, as they can damage the finish and reduce the lifespan of your rims.
Tips to prevent future damage
Preventing damage is a key part of learning how to maintain car rims. Avoid driving too close to curbs or potholes, as these can cause scratches or dents. Parking in shaded areas protects your rims from prolonged sun exposure, which can fade the finish over time.
Invest in high-quality tire protectors or rim guards. These accessories shield your rims from accidental impacts and road debris. Regularly inspect your rims for signs of wear or damage. Addressing minor issues early prevents them from becoming costly repairs.
Note: Maintaining proper tire pressure reduces stress on your rims, improving their longevity and performance.
By following these steps, you can preserve the results of your rim restoration and keep your car looking its best for years to come.
Restoring car rims involves a step-by-step process that ensures a professional finish. DIY restoration saves money and provides a sense of accomplishment. Regular cleaning and protective coatings keep your rims in top condition. By following these steps, you can maintain your rims’ appearance and extend their lifespan effectively.


Share:
Why Do Car Headlights Become Foggy and How to Stop It
Key Advancements in Carbon Fiber Brake Calipers for High-Performance Cars