You can achieve outstanding performance in your carbon fiber projects by mastering a few essential techniques. Carbon fiber parts deliver incredible strength and durability while remaining remarkably light. The table below shows how these components outperform traditional materials in demanding applications:
|
Property |
Value |
Significance |
|---|---|---|
|
Maximum stress |
1171 MPa |
High strength and durability |
|
Maximum strain |
0.007 |
Near material limits, supporting reliability |
|
Weight |
0.420 kg |
About half the weight of aluminum, for efficiency |
Prototyping with carbon fiber offers you a direct path to better performance, whether you focus on process control or learn from carbon fiber build stories. You will find that careful prototyping leads to stronger, lighter results every time.
Key Takeaways
-
Prepare your workspace carefully with good ventilation, organized tools, and proper safety gear to ensure strong, high-quality carbon fiber parts.
-
Choose the right materials by selecting suitable carbon fiber fabrics, resins, and hybrid layers to balance strength, weight, and cost.
-
Measure and cut precisely using accurate tools and methods to avoid mistakes that weaken your parts or add unnecessary weight.
-
Mix and apply resin evenly while preventing air bubbles to create durable, lightweight composites with consistent performance.
-
Use proven fabrication methods like prepreg layup, vacuum bagging, and automation to achieve strong, lightweight parts with excellent finish and reliability.
Material Basics
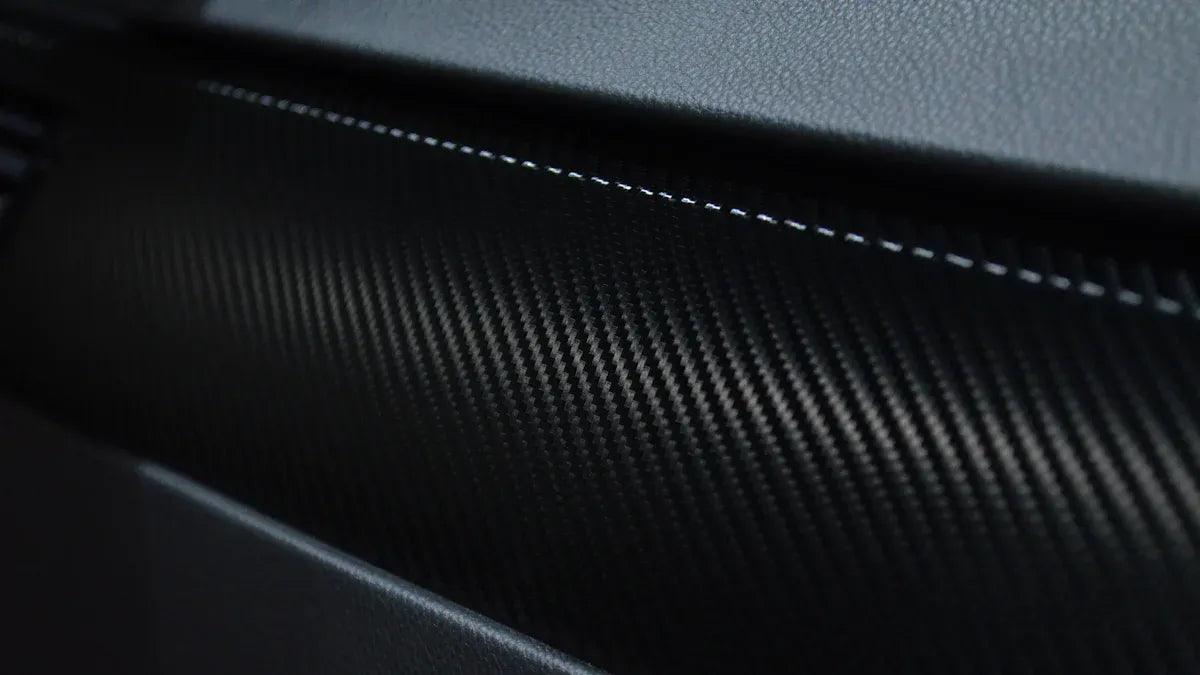
Carbon Fiber Properties
You gain a significant advantage when you choose carbon fiber for your projects. Carbon fiber reinforced polymer offers a remarkable strength to weight ratio, making it ideal for high-performance applications. You notice that these composites deliver high tensile strength, excellent flexibility, and low weight compared to metals or plastics.
-
Carbon fiber composites show anisotropic behavior. Their mechanical properties change depending on the direction of the fibers.
-
You must measure multiple elastic moduli, Poisson’s ratios, and shear moduli along three axes to fully characterize these materials.
-
Testing protocols require you to cut samples at different angles and repeat tests to ensure reliable results.
-
During tensile testing, you may observe fiber pull-out or fracture, while flexural testing can reveal delamination, a failure mode unique to layered composites.
Experimental data confirms the superior strength and stiffness of carbon fiber. For example, tensile testing of composite laminates shows a peak strength of around 885 MPa at a strain of 1.27%. After fiber fracture, the composite’s stress response changes, highlighting the interaction between fiber and matrix.
|
Fiber Type |
Tensile Strength (GPa) |
Young’s Modulus (GPa) |
Maximum Elongation (%) |
|---|---|---|---|
|
High Tensile (HT) |
3 – 5 |
200 – 250 |
1 – 2 |
|
Intermediate Modulus (IM) |
4 – 7 |
250 – 350 |
1 – 2 |
|
High Modulus (HM) |
2 – 4.5 |
350 – 450 |
<1 |
|
Ultra High Modulus (UHM) |
~3 |
>700 |
<0.5 |
Fiber Orientation
You control the strength and flexibility of your composite by adjusting fiber orientation. Aligning fibers in the load direction maximizes strength to weight ratio. When you use multiple orientations, you improve flexibility and distribute loads more evenly. Testing in both longitudinal and transverse directions helps you understand how your composite will perform under real-world conditions.
Weave Types
You select from several weave types to tailor your composite’s properties.
-
Plain weave offers balanced strength and flexibility, making it suitable for many applications.
-
Twill weave provides greater drapability and a smoother finish, which helps when you need complex shapes.
-
Satin weave maximizes flexibility but may sacrifice some strength.
Choosing the right weave lets you optimize the balance between strength, weight, and flexibility for your specific needs.
Preparation
Workspace Setup
You set the foundation for every successful carbon fiber project by preparing your workspace. Choose a well-ventilated area to minimize exposure to fumes from resins and adhesives. Install fans or an exhaust system to keep air moving. Keep your work surface clean and free of clutter. Place all materials within easy reach to avoid unnecessary movement during fabrication. Research shows that meticulous workspace preparation, especially controlling fiber orientation and print parameters, leads to composites with up to 2.7 times greater strength and reliability. When you organize your workspace, you reduce the risk of errors and defects, ensuring your parts meet the highest standards.
Tip: Use a dedicated table or bench for carbon fiber work. Cover it with a disposable sheet or silicone mat for easy cleanup.
Safety Gear
You protect yourself and maintain a safe environment by wearing the right safety gear. Always use nitrile gloves to prevent skin contact with resins and hardeners. Wear a respirator mask rated for organic vapors to avoid inhaling harmful fumes. Safety glasses shield your eyes from splashes and airborne fibers. If you sand or cut carbon fiber, use a dust mask or respirator and work in a well-ventilated area. Long sleeves and closed-toe shoes add another layer of protection.
Tool Organization
You boost efficiency and improve the quality of your finished parts by organizing your tools before you start. Arrange scissors, rollers, brushes, and measuring cups in a logical order. Store sharp blades and cutting tools safely to prevent accidents. Keep mixing sticks, containers, and cleaning supplies nearby. Label your tools and materials for quick identification. A tidy setup helps you work faster and reduces the chance of mistakes.
Note: Preparation is not just about safety—it directly impacts the strength and weight of your carbon fiber parts. Careful planning and organization lead to better results every time.
Material Selection
Fabric Types
You choose from several fabric types to match your project’s requirements. Woven fabrics, such as plain, twill, and satin, offer different balances of strength and flexibility. Unidirectional fabrics provide high tensile strength in one direction, making them ideal for high-performance applications where you need maximum reinforcement. Non-woven mats deliver isotropic properties but lower mechanical performance. The right fabric type ensures your composite meets the demands of your design.
Resin Choices
Selecting the right resin is critical for both performance and durability. Epoxy resin delivers the highest strength and excellent dimensional stability, making it the top choice for carbon fiber reinforcement in demanding applications. Polyester resin offers a cost-effective solution with easy handling, though it provides lower mechanical properties. Vinyl ester resin strikes a balance, offering superior corrosion and heat resistance. Nanocomposite resins, which include nanoparticles like graphene, push the boundaries of strength and thermal stability, resulting in composites that outperform traditional systems.
|
Resin Type |
Performance Characteristics |
Durability & Limitations |
|---|---|---|
|
Epoxy Resin |
Highest strength, excellent dimensional stability, strong bonding; suitable for vacuum infusion; medium viscosity |
Not UV stable; requires topcoat for UV exposure; not compatible with chopped strand mat |
|
Polyester Resin |
Most economical; easy handling; fast curing; good corrosion resistance; high thixotropic index (won’t run on vertical surfaces) |
Lower physical/mechanical properties compared to epoxy and vinyl ester |
|
Vinyl Ester Resin |
Balanced properties between epoxy and polyester; superior corrosion resistance, heat resistance, and toughness |
Short shelf life (~3 months) |
You must weigh the trade-offs between cost, recyclability, and mechanical performance when choosing a resin. Epoxy resins excel in strength, but thermoplastics like polypropylene offer recyclability and easier processing.
Hybrid Layering
Hybrid layering allows you to tailor the composite’s properties for specific applications. By combining different fibers or resins, you can achieve a balance between strength, impact resistance, and cost. For example, integrating bamboo fibers with carbon fiber in a polypropylene matrix significantly boosts flexural strength and vibrational damping, as shown in the chart below.

This approach supports sustainable design and cost-effective manufacturing while maintaining high performance. You gain the flexibility to optimize your composite for unique project needs.
Measuring and Cutting
Accurate Measuring
You ensure the strength and fit of your carbon fiber parts by measuring with precision. Start by selecting high-quality measuring tools, such as digital calipers, micrometers, and wireless precision gauges. These instruments reduce manual errors and speed up data collection. Wireless tools also connect to data management systems, which helps you track measurements and maintain quality control. Advanced imaging, like polarization cameras and X-ray microscopes, allows you to inspect fiber alignment and detect internal flaws before cutting.
|
Instrument |
Precision Level |
Application |
|---|---|---|
|
Digital Caliper |
±0.01 mm |
General thickness and width |
|
Micrometer |
±0.001 mm |
Fine thickness and diameter checks |
|
Wireless Gauge |
±0.005 mm |
Fast, traceable measurements |
|
X-ray Microscope |
Sub-micron |
Internal structure and flaw detection |
Tip: Record all specimen parameters, such as material type and roving size, before you begin. This practice supports consistent results and easier troubleshooting.
Cutting Techniques
You achieve clean, accurate cuts by matching your cutting method to the material and project needs. CNC mills and routers, equipped with diamond-coated end mills, deliver high precision and repeatability. Set spindle speeds around 10,000 RPM and adjust feed rates based on thickness. For small jobs, use manual tools like hacksaws or Dremel tools with fine-toothed blades. Always clamp your work securely to prevent shifting and fraying. Dust extraction and protective gear are essential for safety.
|
Cutting Method |
Tool Type |
Key Advantages |
|---|---|---|
|
CNC Mill/Router |
Diamond-coated end mill |
High precision, repeatable cuts |
|
Manual Hacksaw |
Fine-toothed blade |
Accessible, good for small parts |
|
Dremel Tool |
Cutting wheel |
Detailed cuts, variable speed |
|
Laser Cutter |
Blue laser beam |
Clean edges, no tool wear |
-
Use air or mist cooling to prevent heat damage.
-
Maintain and calibrate machines regularly for consistent results.
Handling Prepregs
You handle prepreg carbon fiber with care to preserve resin content and fiber alignment. Store prepregs in a cool, dry place, ideally refrigerated, to prevent premature curing. When cutting, use sharp blades and avoid stretching the material. Lay out each piece on a clean, flat surface and cover with protective film until use. Work quickly but carefully, as prepregs can become tacky at room temperature.
Note: Careful measuring and cutting set the foundation for strong, lightweight carbon fiber parts. Precision at this stage prevents costly mistakes later in the process.
Resin Mixing & Application
Mixing Resin and Hardener
You achieve strong, lightweight carbon fiber parts by mixing resin and hardener with precision. Always measure both components by weight using a digital scale. This method ensures you follow the exact mix ratios recommended by manufacturers, such as those found in the Proset LAM 125/135 Mix Chart. Volumetric methods can introduce errors, so avoid them when possible. Use manual metering pumps or automated mix machines for larger projects. These tools split and fold the resin and hardener streams, creating a fully homogeneous mixture. Pneumatically-driven piston pumps or positive-displacement gear pumps help you maintain accurate ratios, even when you adjust for different batch sizes. Consistent mixing at the molecular level prevents weak spots and ensures your composite performs as expected.
Tip: Always scrape the sides and bottom of your mixing container to avoid unmixed resin or hardener.
Even Application
You apply the mixed resin evenly to saturate every fiber. Use a roller, brush, or squeegee to spread the resin across the fabric. Work methodically from the center outward, pressing gently to avoid shifting the fibers. Apply just enough resin to wet out the fabric without flooding it. Too much resin adds unnecessary weight and can weaken the part. Too little leaves dry spots that reduce strength. Check for uniform color and sheen as you work. This visual cue helps you confirm complete saturation.
|
Tool |
Best Use |
|---|---|
|
Roller |
Large, flat surfaces |
|
Brush |
Small or detailed areas |
|
Squeegee |
Removing excess resin |
Air Bubble Prevention
You prevent air bubbles by working slowly and carefully during the application process. Air trapped in the resin can create weak points and reduce the part’s durability. Use a laminating roller to press out bubbles as you go. For critical parts, consider vacuum bagging to remove trapped air and excess resin. If you see bubbles, pop them with a pin or use a heat gun briefly to help them rise and escape. Always inspect the surface before curing to ensure a flawless finish.
Note: Careful resin mixing and application set the foundation for a strong, lightweight composite. Attention to detail at this stage pays off in the final product.
Fabrication Methods
Prepreg Layup
You achieve exceptional strength and consistency in carbon fiber parts by using prepreg layup. Prepregs are carbon fiber fabrics pre-impregnated with a precise amount of resin. This method allows you to control resin content and fiber alignment, which directly impacts the final performance of your composite. You store prepregs in a cool environment to prevent premature curing. When you lay up each layer, you ensure fibers remain straight and free from wrinkles. This attention to detail results in a carbon fiber composite part with superior mechanical properties.
Manual prepreg layup requires careful handling and rolling to remove air pockets. You can automate this process with techniques like Automated Fibre Placement (AFP). Research shows that the tack between prepreg and tooling plays a critical role in achieving defect-free placement. Metals as tooling materials provide higher tack values, which improves deposition quality. Surface treatments, such as release agents, can reduce tack and lead to defects. By selecting the right tooling and maintaining optimal tack, you increase the reliability and quality of your finished parts.
Tip: Always monitor the temperature and humidity in your workspace. Stable conditions help you maintain consistent resin flow and fiber placement.
Vacuum Bagging
Vacuum bagging stands out as a proven method for producing strong, lightweight carbon fiber parts. You place the layup inside a sealed bag and apply vacuum pressure. This process removes trapped air and excess resin, which increases fiber volume fraction and reduces voids. Studies confirm that vacuum bagging with high consolidation pressure significantly improves resin consolidation and part quality. For example, parts made with cationic resin under high pressure show flexural strengths up to 206 MPa and flexural moduli up to 29 GPa. These values far exceed those of poorly consolidated parts.
You also benefit from improved strength-to-weight and stiffness-to-weight ratios. By optimizing resin type and consolidation pressure, you create components that are both lighter and stronger. Out-of-autoclave vacuum bag-only prepregs further enhance this process. Their microstructure promotes effective gas evacuation and suppresses defect formation. You achieve autoclave-quality results without the need for expensive equipment. This method ensures consistent performance and high-quality finishes in every project.
Note: Always use a reliable vacuum pump and check for leaks before starting the curing cycle. Consistent pressure is key to maximizing strength and quality.
Automation
You can scale up production and boost repeatability by integrating automation into your fabrication process. Automated methods, such as filament winding and Automated Fibre Placement, deliver precise fiber placement and resin control. Filament winding wraps continuous fibers around a rotating mandrel, creating parts with high tensile strength. This technique supports both axisymmetric and complex shapes, making it ideal for aerospace and military applications.
Automation reduces human error and increases throughput. Case studies show that automated spray lay-up and filament winding produce high-accuracy, high-performance components. You achieve better quality and consistency, especially for large or complex carbon fiber parts. Automated systems also allow you to monitor and adjust parameters in real time, ensuring each part meets strict performance standards.
Callout: Automation requires upfront investment in equipment and training. However, the long-term gains in quality and efficiency often outweigh the initial costs.
Machining
After curing, you refine your carbon fiber parts through machining. You use CNC mills, routers, or waterjet cutters to achieve precise dimensions and smooth edges. Machining requires sharp, diamond-coated tools to prevent fraying and delamination. You set spindle speeds and feed rates carefully to avoid heat buildup, which can weaken the composite.
Proper machining preserves the strength and performance of your finished parts. You must secure the workpiece firmly and use dust extraction to maintain a clean environment. High-quality machining ensures tight tolerances and a professional finish, which is essential for applications where performance and appearance matter.
Tip: Inspect machined edges for signs of delamination or fiber pull-out. Addressing these issues early helps you maintain the integrity and quality of your carbon fiber composite part.
Curing & Finishing
Curing Process
You ensure the strength and durability of your carbon fiber parts by following a precise curing process. Manufacturers recommend curing in an autoclave at 80°C for one hour, then increasing the temperature to 120°C for another 1.5 hours. This schedule allows the resin to consolidate fully, locking the fibers in place and maximizing mechanical performance. When you control the temperature and timing, you prevent weak spots and voids. Proper curing also improves the bond between layers, which is essential for high-stress applications. Always monitor the curing environment to maintain consistent results.
Tip: Use a programmable oven or autoclave to achieve accurate temperature control throughout the curing cycle.
Sanding & Surface Prep
You prepare the surface of your cured part by sanding, which creates the right texture for bonding and finishing. Studies show that sanding in random directions with the correct grit size increases shear strength by up to 10% compared to unidirectional sanding. This method promotes mechanical interlocking and helps adhesives grip the surface. However, excessive roughness can reduce adhesive wetting, so you must balance texture and smoothness. After sanding, clean the surface thoroughly to remove dust and debris. Surface quality tests reveal that sanding produces the best fatigue strength retention, with parts maintaining over 55% of their strength after one million cycles. This step ensures your part remains reliable under repeated loads.
-
Use medium-grit sandpaper for initial prep.
-
Sand in random directions for optimal bonding.
-
Wipe surfaces with a lint-free cloth before moving to the next step.
Surface Protection
You protect your finished carbon fiber part by applying a surface treatment. Treated surfaces remain fragile and can lose surface energy if exposed to contaminants or delays before bonding. Apply adhesives or coatings in a controlled environment and avoid touching the prepared surface. For long-term durability and a professional appearance, use a clearcoat. This layer shields the composite from UV rays, moisture, and abrasion. Timely application of surface protection preserves the mechanical integrity and appearance of your part.
Note: Always apply protective coatings soon after surface prep to maintain high surface energy and ensure strong adhesion.
Tips and Tricks
Weight Reduction
You can maximize the benefits of carbon fiber by focusing on weight reduction strategies. Reducing weight is not just about using lighter materials. You also need to optimize the thickness and structure of your parts. When you design with carbon fiber, you can create components that are 20% to 30% thinner than those made from aluminum alloys. This approach leads to over 30% reduction in mass per unit volume. You maintain or even improve the strength to weight ratio, which is critical for high-performance applications.
The table below compares key properties of aluminum alloy and carbon fiber composite. You can see how carbon fiber enables significant weight savings while delivering superior mechanical performance:
|
Aspect |
Aluminum Alloy (EN AW 6005 T6) |
Carbon Fiber Composite (T300/Epoxy) |
|---|---|---|
|
Density (kg/m³) |
2700 |
1760 (approx. 35% lower) |
|
Young’s Modulus (N/mm²) |
70,000 |
135,000 |
|
Ultimate Tensile Strength (N/mm²) |
255 |
1860 |
|
Structural Thickness Reduction |
Baseline |
20% to 30% thinner components |
|
Mass Reduction per Unit Volume |
Baseline |
Over 30% reduction |
|
Mechanical Performance |
Good static performance, proof strength 215 N/mm² |
Maintains or improves mechanical performance with high stiffness and strength |
|
Dynamic Behavior |
First vibration mode flexural, stable |
Similar vibration mode with increased eigenvalues (~10% increase), maintaining stiffness-to-mass ratio |
You achieve these results by selecting the right layup techniques and optimizing fiber orientation. In many applications, such as railway vehicles and aerospace, reducing weight translates directly to better efficiency and performance. Always review your design to eliminate unnecessary material and focus on areas where you can safely reduce thickness without sacrificing strength.
Tip: Use simulation software to analyze stress distribution. This helps you identify where you can reduce weight while maintaining safety margins.
Consistency
You ensure high-quality results by maintaining consistency throughout your fabrication process. Consistent procedures lead to predictable outcomes, which is essential for both small projects and large-scale applications. Start by standardizing your workspace setup and tool organization. Always use the same measuring tools and calibration methods for every batch. This reduces variability and helps you spot issues early.
-
Prepare your materials in advance and store them under controlled conditions.
-
Follow the same resin mixing ratios and application techniques for each part.
-
Monitor curing times and temperatures closely.
You can also document your process with checklists or digital logs. This practice makes it easier to repeat successful builds and troubleshoot problems. Consistency in fiber orientation, resin content, and curing cycles ensures that your parts meet the required strength to weight ratio every time.
Note: Small changes in process can lead to big differences in final weight and performance. Stick to proven methods and refine your workflow as you gain experience.
Common Mistakes
You avoid costly errors by learning from common mistakes in carbon fiber fabrication. Many builders overlook the importance of preparation and process control. Skipping steps or rushing through layup can introduce defects that weaken your part and add unnecessary weight.
Here are some frequent mistakes and how you can prevent them:
-
Inaccurate Measuring: Failing to measure fabric or resin precisely leads to inconsistent results and excess weight.
-
Improper Fiber Orientation: Misaligned fibers reduce strength and can cause premature failure in demanding applications.
-
Overuse of Resin: Applying too much resin adds weight and creates brittle areas. Always aim for full saturation without flooding the fabric.
-
Poor Air Removal: Trapped air bubbles weaken the composite and can increase weight. Use rollers and vacuum bagging to eliminate voids.
-
Inadequate Curing: Rushing the curing process or using incorrect temperatures results in weak bonds and unpredictable performance.
Always inspect your work at every stage. Addressing small issues early prevents larger problems later.
You improve your results by following these tips and tricks. Focus on weight reduction, maintain consistency, and avoid common mistakes. These habits help you produce carbon fiber parts that excel in strength, weight, and reliability for a wide range of applications.
Carbon Fiber Prototyping
Rapid Prototyping
You can accelerate your carbon fiber prototyping process by using rapid prototyping techniques. These methods let you move from concept to physical part in hours or days, not weeks or months. Companies like HLH Rapid provide quotes within 24 hours, so you can start your project quickly. When you use rapid prototyping, you gain the flexibility to test new ideas and adjust your design without long delays. Prepreg carbon fiber molding, carbon fiber machining, and 3d printed carbon fiber all support fast turnaround and high-quality results.
With rapid prototyping, you can create custom carbon fiber prototypes that match your exact requirements. This approach supports low-volume production and lets you experiment with complex shapes or features. You can also use 3d printed carbon fiber to produce intricate geometries that would be difficult with traditional methods. Rapid prototyping reduces your development time and costs, giving you a competitive edge in product innovation.
Tip: Use rapid prototyping to validate your design before committing to full-scale production. This step helps you catch issues early and refine your approach.
Testing & Refinement
You ensure your professional-looking carbon fiber prototypes meet performance goals by focusing on thorough testing and refinement. Rapid prototyping enables you to conduct functional testing soon after fabrication. You can check for strength, durability, and usability under real-world conditions. These tests help you identify weaknesses and make improvements before final production.
You should perform several types of testing:
-
Functional testing: Verifies that your prototype performs as intended.
-
Durability testing: Assesses how your part withstands repeated use or extreme environments.
-
Usability testing: Evaluates how users interact with your prototype.
After each round of prototyping and testing, you refine your design based on the results. Rapid prototyping allows you to repeat this cycle quickly, so you can achieve optimal performance and reliability. By using 3d printed carbon fiber and other advanced methods, you can iterate efficiently and produce carbon fiber prototyping results that exceed expectations.
Carbon Fiber Build Stories
Real-World Examples
You can learn a lot from real carbon fiber build stories that showcase proven fabrication methods and their results. These stories highlight how you can achieve strong, lightweight parts by following best practices:
-
In one project, engineers used recycled carbon fiber-reinforced thermoplastic composites to create new parts through compression and injection molding. By controlling fiber length with sieving, they improved tensile strength and thermal stability. This approach also supported 100% material utilization, showing you how sustainable manufacturing can deliver high performance.
-
Another set of carbon fiber build stories comes from the fabrication of CFRP composite pipes. Teams used filament winding, pultrusion, and resin transfer molding to produce pipes with excellent mechanical properties. They relied on mechanical testing and non-destructive evaluation, such as ultrasonic testing and X-ray CT, to ensure reliability and structural integrity.
-
A closed-loop recycling process allowed builders to use previously recycled carbon fibers as feedstock for new composites. This method demonstrated how you can maintain good mechanical performance while supporting a circular economy.
These carbon fiber build stories prove that careful process control, material selection, and testing lead to consistent, high-quality results.
Lessons Learned
You gain valuable insights by studying carbon fiber build stories. Here are some key takeaways:
-
Always control fiber orientation and length to maximize strength and durability.
-
Use proper molding pressure and temperature to improve fiber volume fraction and reduce defects.
-
Rely on thorough testing, including tensile and flexural tests, to verify your part’s performance.
-
Embrace sustainable practices, such as recycling and closed-loop manufacturing, to reduce waste and support long-term success.
You see that every successful project in these carbon fiber build stories follows the same core principles: preparation, precision, and process control. When you apply these lessons, you consistently achieve strong, lightweight carbon fiber parts that meet demanding requirements.
You can achieve strong, lightweight carbon fiber parts by focusing on preparation, careful material selection, and precise fabrication. The table below shows how carbon fiber outperforms traditional materials in both specific stiffness and strength:
|
Material |
Specific Stiffness (MSI) |
Specific Strength (KSI) |
|---|---|---|
|
Carbon Fiber |
~200 |
~1800 |
|
6061 Aluminum |
~100 |
~350 |
|
4130 Steel |
~100 |
~417 |
You will see benefits across many fields:
-
Aerospace and automotive projects gain efficiency from reduced weight.
-
Sports equipment lasts longer and performs better.
-
Medical devices become lighter and more comfortable.
-
Robotics achieve greater speed and precision.
Mastering these methods brings real satisfaction and unlocks new levels of performance in your builds.
Share:
Motorsport-grade fasteners keep your race car safe
How the 2025 Tesla Model 3 Interior Stands Out from Previous Versions