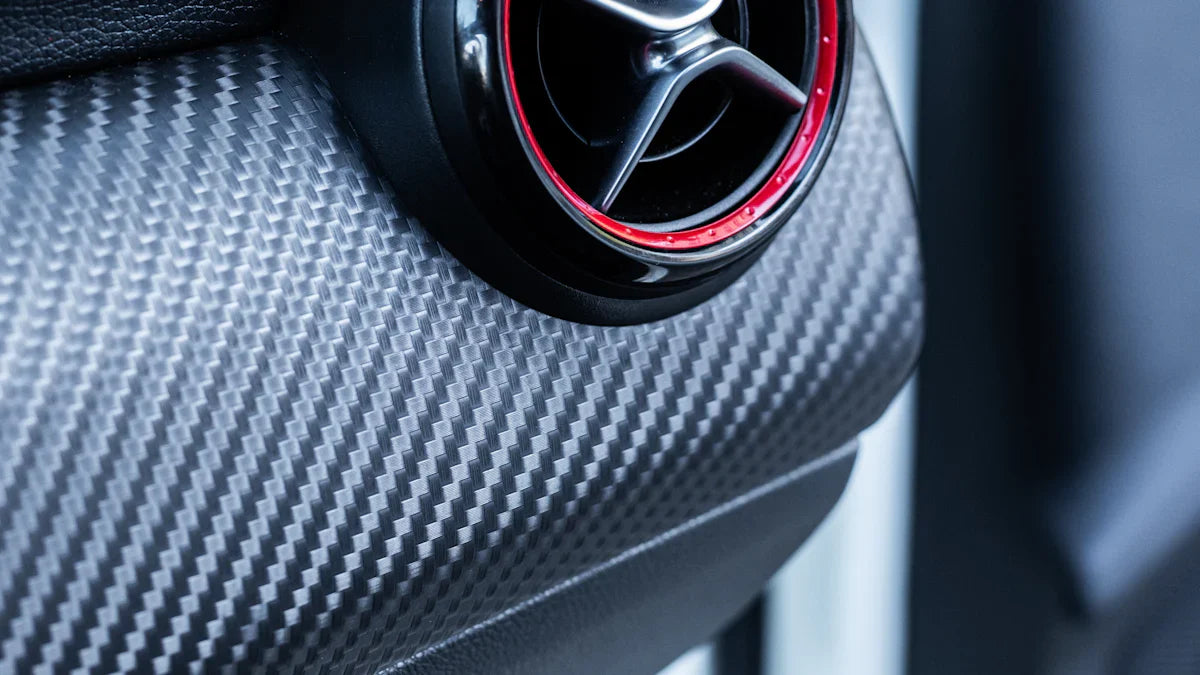
Have you ever wondered how to make your DIY projects stronger, lighter, and more professional-looking? Carbon fiber fabric might be just what you need! This material is made from thin strands of carbon woven together, creating a fabric that’s incredibly strong yet surprisingly lightweight. It’s perfect for crafting anything from custom car parts to sleek furniture.
Why is it so popular? For starters, it’s durable and can handle wear and tear like a pro. Plus, it’s versatile—you can mold it into almost any shape. Whether you’re a beginner or a seasoned DIYer, carbon fiber fabric opens up endless possibilities for your creative projects.
Key Takeaways
-
Carbon fiber fabric is light and strong, perfect for DIY projects. Use it to make your creations tougher and look better.
-
Gather needed items like carbon fiber fabric, resin, and tools first. Being ready helps your project go smoothly and turn out great.
-
Always stay safe by wearing gloves, goggles, and a mask. This protects you from resin and fiber irritation.
-
Prepare your mold well to get a smooth surface. A good mold saves time and makes your project look better.
-
Finish by sanding and polishing for a neat, professional look. Check for mistakes and fix them to get the best results.
Materials and Tools for Carbon Fiber Fabric Projects
Before diving into your project, you’ll need the right materials and tools. Having everything ready will make the process smoother and more enjoyable. Let’s break it down step by step.
Essential Materials
Carbon fiber fabric
This is the star of your project. Carbon fiber fabric is lightweight, strong, and flexible. It’s perfect for creating custom shapes or reinforcing structures. You can also find it in different weaves and thicknesses, so pick one that suits your project.
Epoxy or polyester resin
To bond the fabric and give it a solid structure, you’ll need a resin. Epoxy resin is a popular choice because it’s durable and easy to work with. It creates a strong bond and gives your project a professional finish. Polyester resin is another option, but it’s less common for DIY projects.
Mold release agent
A mold release agent is essential if you’re using a mold. It prevents the resin from sticking to the mold, making it easier to remove your finished piece. Without it, you might damage your project or the mold.
Sandpaper and polishing tools
Once your project cures, you’ll want to smooth out any rough edges. Sandpaper and polishing tools help you achieve a clean, glossy finish. They’re especially useful for projects like carbon fiber sheets, where appearance matters.
Tools for Working with Carbon Fiber Fabric
Scissors or rotary cutter
Cutting carbon fiber fabric requires precision. Use sharp scissors or a rotary cutter to avoid fraying and ensure clean edges. Dull tools can ruin the fabric, so keep them sharp.
Brushes or rollers
You’ll need brushes or rollers to apply the resin evenly. They help you coat the fabric without leaving bubbles or streaks. Choose tools that are easy to handle and disposable, as resin can be hard to clean.
Vacuum bagging system (optional)
For a professional finish, consider using a vacuum bagging system. It compresses the fabric and resin, removing air bubbles and ensuring a smooth surface. While optional, it’s a great tool for advanced projects.
Protective gloves and safety gear
Safety first! Always wear gloves, goggles, and a respirator mask when working with resin. These materials can irritate your skin and lungs, so protect yourself while crafting.
Tip: Organize your workspace before starting. Having your materials and tools within reach will save you time and effort.
Safety Precautions When Using Carbon Fiber Fabric
Working with carbon fiber fabric can be exciting, but safety should always come first. You’ll be handling materials like resin and fine fibers, which can irritate your skin or lungs if you’re not careful. Let’s go over the essential precautions to keep you safe while crafting.
Personal Protective Equipment
Gloves, respirator mask, and safety goggles
You’ll need the right gear to protect yourself. Start with a good pair of gloves. They’ll keep resin and fibers off your hands, which can cause irritation. Nitrile gloves work well because they’re durable and resist chemicals.
A respirator mask is another must-have. Resin fumes can be strong, and carbon fiber dust can irritate your lungs. Choose a mask designed for chemical vapors and fine particles. It’ll help you breathe easier while you work.
Don’t forget safety goggles. Resin splashes and tiny fibers can harm your eyes. Goggles with a snug fit will shield your eyes and keep you focused on your project.
Tip: Always check your gear for damage before starting. A small tear in your gloves or a loose mask strap can compromise your safety.
Setting Up a Safe Workspace
Proper ventilation and clean environment
Your workspace matters just as much as your gear. Make sure the area is well-ventilated. Open windows or use a fan to keep fresh air circulating. Resin fumes can build up quickly, so good airflow is key.
Keep your workspace clean and organized. Dust, dirt, or clutter can interfere with your project and even pose safety risks. A tidy area helps you work more efficiently and reduces accidents.
Avoiding flammable materials near resin
Resin is flammable, so keep it away from heat sources or open flames. Avoid smoking or using candles in your workspace. Store flammable items like solvents or alcohol in a safe spot, far from your project area.
Note: Always read the safety instructions on your resin and other materials. Following the guidelines will help you avoid accidents and ensure a smooth crafting experience.
By taking these precautions, you’ll create a safe and comfortable environment for your DIY projects. Safety doesn’t just protect you—it also helps you focus on bringing your creative ideas to life!
Preparing the Mold for Carbon Fiber Fabric
Before you start working with carbon fiber fabric, you’ll need a mold to shape your project. The mold acts as the foundation, giving your piece its form and structure. Preparing it properly ensures a smooth and professional-looking result.
Selecting and Preparing the Mold
Choosing materials like plastic, wood, or metal
When picking a mold, think about the material that best suits your project. Plastic molds are lightweight and easy to work with, making them great for beginners. Wood molds are sturdy and can handle more complex designs. Metal molds, on the other hand, are durable and ideal for high-heat applications.
Choose a material that matches the size and complexity of your project. For example, if you’re making a small decorative item, plastic might be your best bet. For larger or more intricate designs, wood or metal could be a better choice.
Ensuring a smooth, defect-free surface
A smooth mold surface is key to achieving a flawless finish. Inspect your mold for any scratches, dents, or imperfections. Sand down rough spots and fill in any gaps with a filler material.
If your mold has sharp edges, round them off slightly. This helps the carbon fiber fabric lay evenly and prevents tearing. A little extra prep work here saves you time and frustration later.
Tip: If you’re creating your own mold, test it with a small piece of fabric first. This helps you spot any issues before committing to the full project.
Applying Mold Release Agent
Importance of mold release
A mold release agent is your best friend when working with carbon fiber fabric. It creates a barrier between the mold and the resin, making it easy to remove your finished piece. Without it, the resin could stick to the mold, ruining your hard work.
Using a mold release agent also protects your mold, allowing you to reuse it for future projects. It’s a small step that makes a big difference in the long run.
Techniques for even application
Applying the mold release agent evenly is crucial. Start by shaking the bottle or container to mix the contents. Use a brush, sponge, or spray to coat the entire mold surface. Make sure you cover every nook and cranny, especially in detailed areas.
Apply a thin, even layer and let it dry completely before adding more. For best results, apply two to three coats, letting each one dry fully. This ensures complete coverage and makes demolding a breeze.
Note: Always follow the instructions on your mold release agent. Some products require a specific drying time or application method for optimal performance.
By carefully selecting and preparing your mold, you set the stage for a successful project. A well-prepped mold not only saves you time but also helps you achieve a professional finish that you’ll be proud to show off!
Working with Carbon Fiber Fabric
Now that your mold is ready, it’s time to dive into the fun part—working with carbon fiber fabric! This step involves cutting, applying resin, and laying the fabric onto the mold. Let’s break it down so you can make carbon fiber projects with confidence.
Cutting and Preparing the Fabric
Measuring and cutting with precision
Start by measuring the fabric to fit your mold. Use a ruler or measuring tape to ensure accuracy. Mark the dimensions lightly with chalk or a washable marker. Precision is key here—cutting too much or too little can affect the final result.
Once you’ve marked the fabric, grab a pair of sharp scissors or a rotary cutter. Cut along the lines carefully. A steady hand will help you achieve clean edges, which makes the next steps easier.
Preventing fraying with sharp tools
Fraying can be a challenge when working with carbon fiber fabric. To prevent this, always use sharp tools. Dull scissors can pull at the fibers, causing them to unravel. If you notice any fraying, trim the edges immediately to keep the fabric neat.
Tip: You can also use masking tape along the edges before cutting. This helps hold the fibers in place and reduces fraying.
Applying Resin to Carbon Fiber Fabric
Mixing resin correctly
The resin is what binds everything together, so mixing it properly is crucial. Follow the instructions on your resin packaging. Typically, you’ll combine the resin and hardener in a specific ratio. Use a clean container and stir thoroughly to avoid lumps or uneven curing.
Coating the fabric evenly
Once your resin is ready, use a brush or roller to coat the fabric. Start from one end and work your way across. Apply the resin evenly, ensuring every fiber is saturated. Avoid overloading the fabric, as excess resin can create a messy finish.
Note: Work quickly but carefully. Resin begins to set after a short time, so you’ll want to complete this step efficiently.
Laying and Curing the Fabric
Layering fabric on the mold
Now comes the exciting part—laying the carbon fiber onto the mold. Position the fabric carefully, starting from one edge and smoothing it down as you go. Use your hands or a roller to press the fabric into the mold, ensuring it conforms to the shape.
If your project requires multiple layers, repeat the process. Each layer adds strength and durability. Just make sure to apply resin between layers for proper bonding.
Using resin for bonding and curing
The curing process is where the magic happens. Once the fabric is in place, let the resin harden. This can take several hours or even overnight, depending on the resin type. Keep the mold in a stable, dust-free environment during this time.
Optional: Vacuum bagging for a professional finish
For a sleek, professional look, consider vacuum bagging. This technique compresses the fabric and resin, removing air bubbles and ensuring a smooth surface. While optional, it’s a great way to make carbon fiber projects look polished and high-quality.
Tip: If you’re new to vacuum bagging, start with a small project to practice the technique.
By following these steps, you’ll master the art of working with carbon fiber fabric. Whether you’re creating a decorative piece or a functional item, this process will help you achieve impressive results.
Finishing Carbon Fiber Fabric Projects
Once your carbon fiber project has cured, it’s time to add those final touches. This step is all about refining the surface and ensuring your piece looks polished and professional. Let’s dive into the finishing process.
Sanding and Polishing
Smoothing edges and surfaces
Start by inspecting the edges and surfaces of your project. Use sandpaper to smooth out any rough spots or uneven areas. Begin with coarse-grit sandpaper (around 120 grit) to remove larger imperfections. Then, switch to finer grits (like 400 or 600 grit) for a smoother finish.
Work in small, circular motions and apply even pressure. This helps you avoid creating dips or scratches. If you’re working on a curved surface, use a sanding block or sponge to maintain the shape.
Tip: Wet sanding can reduce dust and give you a cleaner result. Just dip the sandpaper in water before sanding.
Achieving a glossy finish
After smoothing the surface, it’s time to make it shine. Use a polishing compound and a soft cloth or buffing pad. Apply the compound in small amounts and rub it in with circular motions. This will bring out the glossy, high-end look that carbon fiber is known for.
For an extra layer of protection, consider adding a clear coat or resin finish. This not only enhances the shine but also protects the surface from scratches and UV damage.
Inspecting and Finalizing
Checking for imperfections
Before calling your project complete, give it a thorough inspection. Look for any bubbles, cracks, or uneven resin layers. Hold the piece up to the light to spot imperfections that might not be visible otherwise.
Run your fingers along the edges and surface. This helps you feel for any rough spots you might have missed during sanding.
Fixing minor issues
If you find small imperfections, don’t worry—you can fix them! For tiny bubbles or dents, apply a small amount of resin to fill the gaps. Let it cure and sand it down to blend with the rest of the surface.
For scratches or dull spots, repeat the polishing process. A little extra effort here can make a big difference in the final look.
Note: Always let your project fully cure before making any adjustments. Rushing this step can lead to more issues.
By following these steps, you’ll create a carbon fiber project that’s not only functional but also visually stunning. Take your time, and enjoy the satisfaction of seeing your hard work come to life!
You’ve now got the tools and knowledge to tackle your own carbon fiber projects! From gathering materials to applying resin and finishing, each step builds toward a durable and sleek result. Start small—maybe a phone case or a decorative panel. Simple projects help you build confidence and refine your skills.
Tip: Don’t be afraid to experiment! Carbon fiber fabric is incredibly versatile. You can use it for creative designs, functional items, or even repairs.
So, grab your tools and let your imagination take the lead. The possibilities are endless!
Share:
What Makes Carbon Fiber Plates Essential in Various Sectors
BMW F10 Engine Options and Driving Modes