You achieve optimal performance by setting up camber with precision and regular checks. Proper camber setup improves handling, maximizes grip, and extends tire life. Incorrect camber causes uneven tire wear, often leading to excessive wear on one side of the tire. Tires with low tread depth, a result of poor camber adjustment, are three times more likely to be involved in tire-related crashes. Setting up camber correctly not only boosts handling but also helps you stay safe and protect your investment.
Key Takeaways
-
Proper camber setup improves your car’s handling, increases tire grip during turns, and extends tire life by preventing uneven wear.
-
Negative camber helps cornering by tilting the tires inward, but too much can cause faster tire wear and reduce straight-line stability.
-
Match your camber angle to your driving style: mild camber for daily driving and more aggressive camber for track or racing use.
-
Use the right tools and safety measures when adjusting camber, and regularly check your alignment to maintain performance and safety.
-
Monitor tire wear and temperature to fine-tune camber settings, and seek professional help if you notice uneven wear or steering issues.
Camber Setup Basics
What Is Camber?
You need to understand camber before you can optimize your car’s performance. Camber refers to the tilt of your wheels when viewed from the front of the vehicle. If you look straight at your car, you will notice that the top of each tire may lean either inward or outward. This tilt is called the camber angle and is measured in degrees. You can measure the camber angle using a spirit level or an electronic device, making sure the tool aligns with the wheel’s center plane. Accurate camber setup starts with precise measurement, as even small changes can affect how your car handles and how your tires wear.
Positive vs. Negative Camber
You will encounter two main types of camber: positive and negative. Positive camber means the top of the wheel leans outward from the vehicle body. Negative camber means the top of the wheel leans inward. Most modern cars use a slight negative camber, usually between 0° and -1°20′ on the front axle. This small negative angle helps you achieve better cornering grip and more predictable handling. Positive camber is rare in performance applications, as it can reduce the tire’s contact patch during turns.
Tip: Always check your camber angle after making suspension changes or replacing tires. Small adjustments can make a big difference in your car’s behavior.
Why Camber Matters
Camber setup plays a crucial role in your car’s handling and tire longevity. When you drive through a corner, the camber angle affects how much of the tire’s surface stays in contact with the road. A well-chosen camber angle increases cornering grip by maximizing the tire’s contact patch during turns. Research shows that camber has little effect on straight-line driving, but it becomes vital during cornering. Adjusting camber can increase the cornering force your tires generate, improving stability and steering response. The impact of camber extends to tire wear as well. Too much negative camber can cause rapid wear on the inside edge, while too little can reduce grip. You must balance your camber setup to get the best mix of performance, safety, and tire life.
Effects on Handling and Tire Wear
Improve Cornering Grip
You can improve cornering grip by adjusting camber to maximize the tire’s contact patch during turns. When you set negative camber, the tire leans inward, which helps maintain more rubber on the road as your car corners. This adjustment increases cornering force and allows you to achieve maximum grip, especially during high-speed maneuvers. Proper camber setup distributes pressure evenly across the tire tread, which boosts traction and stability. For example, testing on a performance car showed that increasing negative camber from 2 to 3 degrees reduced lap times and improved tire temperature distribution. However, too much negative camber can reduce straight-line stability and cause issues like wheelspin or longer stopping distances. You need to find the right balance to enhance handling without sacrificing control.
Tire Wear Patterns
Camber settings have a direct impact on how your tires wear. Excessive negative camber usually causes the inner edge of the tire to wear faster, while too much positive camber leads to outer edge wear. You will most often see inner edge wear, especially if you use aggressive camber or incorrect toe settings. Suspension components and vehicle loads also influence these patterns. Diagnosing tire wear requires you to check both the camber angle and the condition of your suspension. If you notice uneven wear, you should inspect your alignment and adjust camber as needed to prevent premature tire replacement.
Note: Uneven tire wear not only shortens tire life but can also reduce straight-line stability and compromise safety.
Balancing Performance and Longevity
You face a trade-off when setting camber for performance. Aggressive camber angles can enhance handling and responsiveness, but they often accelerate tire wear by putting extra pressure on one side of the tire. If you want to extend tire life, you should keep camber settings closer to manufacturer recommendations. This approach promotes even wear and maintains straight-line stability, though it may limit your car’s ultimate cornering grip. The impact of camber on both handling and tire longevity means you must balance your goals. Regularly check your tire temperatures and wear patterns to fine-tune your setup for your driving style.
Assess Needs and Suspension
Driving Style and Goals
You should always match your camber setup to your driving style and performance goals. Different uses demand different camber angles. For daily driving, you want to prioritize tire longevity, comfort, and straight-line stability. Track days and racing require more aggressive camber to maximize grip during hard cornering, even if it means faster tire wear. Consider these points:
-
Negative camber improves cornering grip by keeping the tire contact patch flat during lateral forces, which is crucial for track use.
-
Excessive negative camber increases inside tire wear, making it less suitable for daily driving.
-
Positive camber is rare and usually only appears in specialized drag racing.
-
The optimal camber angle depends on your suspension setup, tire type, and the surfaces you drive on.
Tip: Always define your goals before adjusting camber. A setup for daily comfort will differ from one built for maximum lap times.
Suspension Types
Your suspension design plays a major role in how you set and maintain camber. Each type offers different levels of adjustability and camber gain during cornering.
-
MacPherson Strut Suspension: Simple and space-efficient, common in compact cars. It offers limited camber adjustment and minimal camber gain under compression, which can reduce cornering grip and straight-line stability.
-
Double Wishbone Suspension: Found in sports cars, it uses two arms to allow precise camber adjustment. This design gains negative camber as the suspension compresses, keeping the tire contact patch flatter and improving handling.
-
Multi-Link Suspension: Used in performance and luxury vehicles, it provides independent control of wheel movement and superior camber adjustability.
-
Other Types: Coil spring, leaf spring, torsion bar, and air suspensions each offer unique characteristics, but most provide less precise camber control than double wishbone or multi-link systems.
A double wishbone suspension setup gives you the best control over camber angle changes during aggressive driving, while MacPherson struts focus on cost and simplicity.
Baseline Camber Settings
You need to start with proven baseline values for your camber angle based on your intended use. The table below summarizes typical settings:
|
Use Case |
Front Camber (degrees) |
Rear Camber (degrees) |
Notes |
|---|---|---|---|
|
Daily Driving |
0 to -1.5 |
Equal or slightly less negative |
Mild camber for tire wear, comfort, and straight-line stability |
|
Track Days |
Around -2.0 |
Around -2.0 |
More negative camber for grip, check straight-line stability |
|
Competitive Racing |
Up to -3.5 |
Up to -3.0 |
Aggressive camber, requires advanced suspension setup |
You should remember that more aggressive camber settings often require modifications to your suspension setup. Always check your tire wear and straight-line stability after making changes.
Adjust Camber Steps
Tools and Equipment
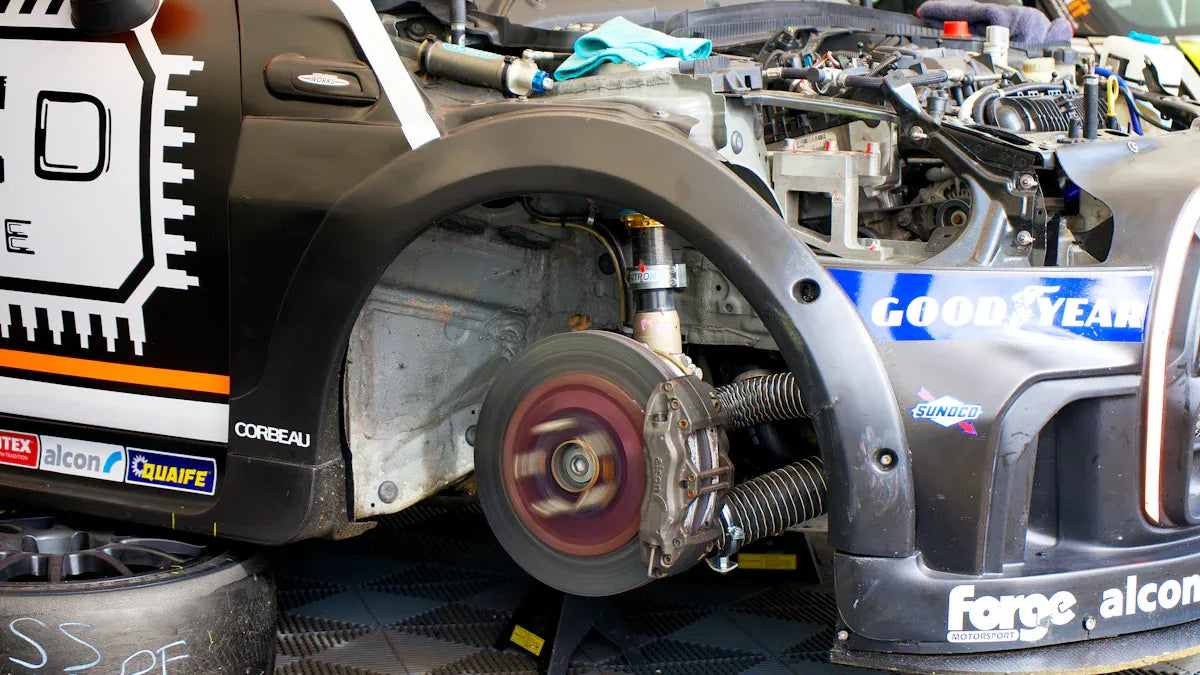
You need the right tools to achieve accurate wheel alignment and camber adjustment. Modern workshops use advanced 3D wheel alignment machines that combine sensors, cameras, and computer software. These systems measure camber, toe, and caster angles with high precision. You will find wheel clamps with rim locking pins that hold the wheels securely during measurement. High-resolution cameras and lasers capture the exact position and angle of each wheel. The computer interface displays real-time alignment data and guides you through the process.
If you work at home, you can use manual tools such as bubble gauges, digital angle finders, and straight edges. Always ensure your equipment is in good condition. A flat, level surface is essential for setting up camber accurately. Stable jack stands or custom-built wooden supports keep your vehicle secure while you work. Tire pressure gauges and torque wrenches help you maintain consistent conditions during adjustment.
Tip: Always check that your tire pressures match your target settings before starting any camber adjustment. Incorrect pressures can affect your measurements and final results.
Measuring Camber
You must measure the camber angle before making any changes. Follow these steps for both manual and digital tools:
-
Park your vehicle on a flat, level surface. Ensure the ride height is correct and the car is stable.
-
Set tire pressures to your desired values. This step ensures consistency in your wheel alignment process.
-
Attach a bubble gauge or digital angle finder to the brake hub or wheel face. Make sure the tool sits flush and level.
-
Read the camber angle directly from the gauge. Note whether it is positive or negative.
-
If you need to adjust camber, move the upper control arm in or out by adding or removing shims, or use camber plates if your suspension allows.
-
After each adjustment, re-measure the camber angle to confirm your changes.
-
Once you finish camber adjustment, check the caster and toe settings, as these angles can influence each other.
Modern alignment machines can complete these measurements in under two minutes, providing instant feedback and graphical displays. Manual methods require more time and care but can still deliver reliable results if you follow each step closely.
Adjust Camber Safely
Safety must come first when setting up camber in your garage. Always use stable jack stands or sturdy wooden supports to raise your vehicle. Never rely on a hydraulic jack alone. Place wheel chocks or blocks behind the tires to prevent movement. Remove the wheels if needed, but secure a few lug nuts to keep the hub steady during measurement.
Work on a flat, level surface to avoid errors in your wheel alignment. Take the weight off the struts before making adjustments. Adjust camber before setting toe, as changes in camber can affect toe alignment. Use an angle finder and straight edge for precise measurement. Double-check that your vehicle remains stable throughout the process.
Alert: Never work under a car without proper support. Always prioritize your safety and the stability of your workspace.
Fine-Tuning with Tire Data
You can achieve the best camber setup by analyzing tire temperature data. After driving at your target pace, use a tire pyrometer probe to measure temperatures at three points across each tire: inside edge, center, and outside edge. Insert the probe a few millimeters deep to get accurate readings near the tire cord.
If the inside edge shows a higher temperature than the outside, your camber angle is too aggressive. If the outside edge is hotter, you need more negative camber. Adjust camber in small increments, using shims or camber plates as needed. For every 12-degree difference between inside and outside, use a 1/8-inch shim; for a 6-degree difference, use a 1/16-inch shim. Record your results and repeat the process until you achieve even temperatures across the tire.
Avoid using surface temperature tools, as they can give misleading results due to external factors. Focus on deep temperature readings for the most accurate feedback on your camber adjustment.
Note: Consistent measurement technique and careful documentation help you develop a reliable approach to setting up camber for your specific needs.
When to Seek Professional Alignment Help
You should seek professional wheel alignment services if you notice uneven tire wear, your vehicle pulls to one side, or the steering feels off-center. After installing new tires or experiencing a significant impact, professional alignment ensures all angles meet manufacturer specifications. Advanced alignment machines and skilled technicians provide the precision needed for complex adjustments. Regular professional checks, about every 6,000 miles, help maintain safety, efficiency, and tire longevity. If you lack the proper tools or experience, professional alignment is the safest and most effective choice.
Setting Up Camber Tips
Common Mistakes
You can avoid many issues by understanding the most frequent mistakes in camber adjustment. Many drivers believe that adding more negative camber always improves handling. This approach ignores manufacturer specifications and often leads to uneven tire wear and reduced stability. Excessive negative camber may cause your vehicle to pull to one side, making it harder to control. Some people think wheel alignment is only about tire appearance, but it also affects handling and fuel efficiency. You should not wait for a major impact or visible tire wear before checking alignment. Not all mechanics have the skills or equipment to perform precise wheel alignment, so always choose a qualified technician.
Tip: Stick to manufacturer-recommended camber settings for daily driving. Save aggressive adjustments for track use where you can monitor tire wear and performance closely.
Maintenance and Checks
You need to maintain your camber settings to ensure consistent performance and safety. Environmental factors like potholes, rough roads, and temperature changes can push your alignment out of spec. Regular maintenance helps you catch problems early and avoid costly repairs.
-
Schedule professional wheel alignment checks every 6,000 to 10,000 miles, or with every other oil change.
-
Inspect suspension components for wear or damage that could affect camber stability.
-
Watch for signs of misalignment, such as uneven tire wear or your vehicle pulling to one side.
-
After driving on rough roads or hitting a curb, check your alignment sooner.
-
Maintain proper tire pressure, especially during temperature changes, to prevent uneven weight distribution.
-
Keep detailed records of all camber adjustments and alignment services. Use a notebook or digital tool to track changes and help with future maintenance.
Note: Preventive maintenance and regular wheel alignment checks extend tire life, improve handling, and keep your vehicle safe on the road.
You achieve the best results by following a structured camber setup process and checking your alignment regularly. Use accurate tools like digital camber gauges or alignment kits to ensure precise adjustments. Remember, negative camber can boost cornering but may impact tire wear and straight-line stability if not set correctly. For ongoing success, consult professional guidelines and certified technicians. Apply these steps, monitor your results, and enjoy improved handling and safety.
Share:
Pre-preg Carbon Fiber Manufacturing Process: Pros and Cons Explained
What Underbody Aerodynamic Diffusers Do for the BMW G82 M4