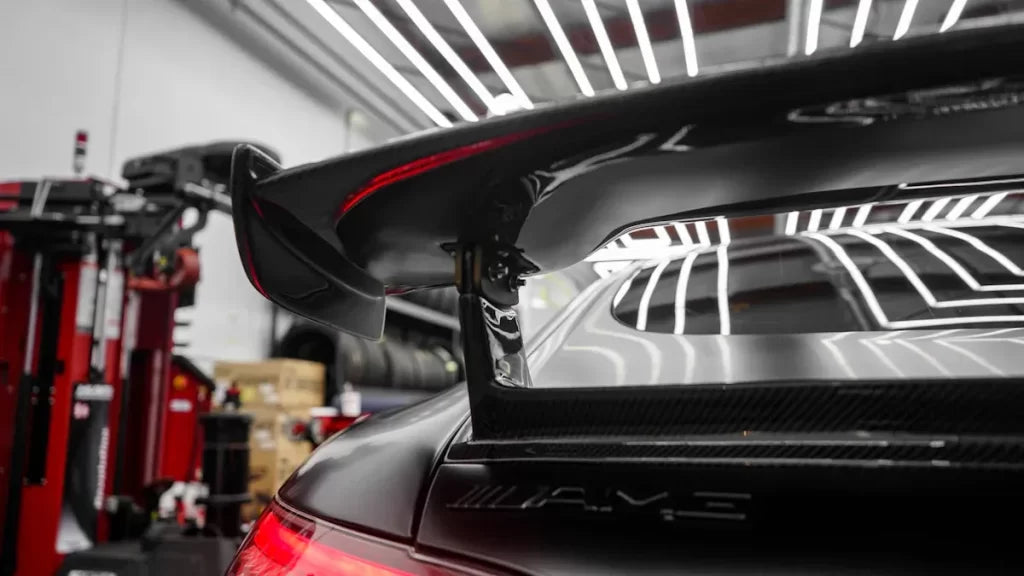
Water-resistant carbon fiber overlays are a popular choice in vehicle customization. These overlays combine style and functionality, offering a sleek, modern look while protecting your car’s surface from water damage and wear. You can use them to enhance your vehicle’s aesthetics and safeguard it against scratches and environmental elements. This type of customization is not only practical but also achievable with the right tools and guidance. Whether you’re a beginner or an enthusiast, installing water-resistant carbon fiber overlays can transform your car into a personalized masterpiece.
Key Takeaways
-
Collect tools like a sharp knife, heat gun, and squeegee for easy installation.
-
Wash your car’s surface well so the wrap sticks better and lasts longer.
-
Measure carefully and cut the carbon fiber wrap a bit bigger than the area you need.
-
Use a sealant after installing to make it last longer and protect from water and sunlight.
-
Work slowly on each step to get a neat look and avoid errors.
Tools and Materials for Installing Carbon Fiber Wrap
Before you begin installing a carbon fiber vinyl wrap, gathering the right tools and materials is essential. These items ensure a smooth application process and a professional finish.
Essential Tools
You will need several tools to install a carbon fiber vinyl wrap effectively. Each tool plays a specific role in achieving a seamless application:
-
Utility knife or precision cutting tool: Use this to cut the vinyl wrap accurately. Clean cuts help you achieve a polished look.
-
Heat gun or hairdryer: This tool softens the vinyl, making it more pliable. It also activates the adhesive for better bonding, especially on curved surfaces.
-
Squeegee or application tool: A squeegee helps you smooth the vinyl during application. It removes air bubbles and prevents wrinkles.
-
Measuring tape or ruler: Accurate measurements prevent material wastage. Use this to measure both the car’s surface and the vinyl.
-
Microfiber cloths: These cloths are gentle and lint-free. They are perfect for cleaning the car’s surface before applying the vinyl.
Other helpful tools include small magnets to hold the vinyl in place and gloves to protect the material from fingerprints.
Materials
The materials you choose directly impact the quality and durability of your carbon fiber vinyl wrap installation. Here’s what you’ll need:
-
Water-resistant carbon fiber vinyl wrap: This is the main material. It provides the sleek, modern look and water resistance you want.
-
Adhesive promoter (optional): This product enhances adhesion, especially on tricky surfaces. It also improves durability and ensures the wrap lasts longer.
-
Cleaning solution (e.g., isopropyl alcohol): Use this to clean the car’s surface thoroughly. A clean surface ensures the vinyl adheres properly.
-
Sealant or protective coating: Applying a sealant after installation adds an extra layer of protection. It boosts water resistance and shields the vinyl from UV damage.
Having these tools and materials ready will make the installation process smoother and more efficient. With proper preparation, you can achieve a flawless carbon fiber vinyl wrap application.
Preparing Your Car for Carbon Fiber Vinyl Wrap Installation
Proper surface preparation is crucial for a successful carbon fiber vinyl wrap installation. Follow these steps to ensure your car is ready for the overlay.
Cleaning the Surface
A clean surface ensures the vinyl adheres properly and lasts longer. Begin by washing your car thoroughly to remove dirt, grease, and debris. Pay special attention to hidden areas like under the hood and wheel wells. Use a general cleaner and degreaser or an all-in-one cleaner for effective results. After washing, dry the car with a microfiber cloth to avoid lint.
For specific areas where the wrap will be applied, use isopropyl alcohol to eliminate any remaining contaminants. Perform the “squeaky finger” test by running your finger over the surface. If it squeaks, the surface is clean and ready for the next step. Removing hardware like emblems or nozzles can help you clean hard-to-reach spots.
Tip: Use a clay bar or scratchless sponge for finishing touches to achieve a perfectly smooth surface.
Inspecting and Repairing
Inspect the body panels for scratches, dents, or imperfections. These flaws can affect the final appearance of the wrap. Repair any damage to create a smooth surface. For shallow scratches, use 2000-grit wet sandpaper followed by a rubbing compound. Deeper scratches may require touch-up paint that matches your car’s color.
If you find dents, try simple methods like the boiling water technique or a plunger to pop them out. For more advanced repairs, use a dent puller or a hammer and mallet to push the dent back into place. Addressing these issues ensures the vinyl wrap adheres evenly and looks professional.
Measuring and Cutting
Accurate measurements are essential to avoid material wastage and ensure a seamless fit. Use a measuring tape to determine the dimensions of the body panels you plan to cover. Add a small margin to your measurements to account for trimming.
Lay the carbon fiber vinyl wrap on a flat surface and cut it slightly larger than the target area. This extra material allows you to adjust the wrap during application. Precision at this stage will save you time and effort later.
By following these steps, you’ll create the perfect foundation for your carbon fiber vinyl wrap. A well-prepared surface not only enhances adhesion but also ensures a flawless finish.
Step-by-Step Installation of Water-Resistant Carbon Fiber Overlays
Positioning the Overlay
To start the installation, align the carbon fiber vinyl wrap with the surface you want to cover. Lay the wrap gently over the area, ensuring it matches the contours of the car. Adjust it as needed to achieve a proper fit. This step helps you avoid unnecessary repositioning later.
Once aligned, use masking tape to secure the overlay temporarily. Place the tape along the edges to hold the vinyl in place. This keeps the material steady while you work on applying it. Masking tape also allows you to make minor adjustments without damaging the wrap.
Applying the Overlay
Begin by peeling back a small section of the backing to expose the adhesive. Avoid removing the entire backing at once, as this can make the material difficult to handle. Start at one edge and work your way across the surface.
As you apply the carbon fiber wrap, use a squeegee to smooth it down. Work in small sections, moving from the center outward to push out air bubbles. This technique ensures a wrinkle-free finish. If you encounter stubborn bubbles, lift the wrap slightly and reapply it while smoothing with the squeegee.
Heating and Smoothing
Use a heat gun to soften the vinyl wrap during installation. Heat makes the material more pliable, allowing it to conform to curves and edges. Hold the heat gun a few inches away from the surface to avoid overheating.
After heating, use the squeegee again to remove any remaining air bubbles or wrinkles. Apply gentle pressure and move in a consistent direction. For a professional finish, follow these steps:
-
Apply thin layers of epoxy to the surface, waiting about 30 minutes between each layer.
-
Sand the epoxy with 150-grit sandpaper to smooth it without damaging the vinyl.
-
Use an exacto knife to trim edges and clean up imperfections.
-
Wet-sand with 400-grit sandpaper for a smoother finish before applying a clear coat.
-
Ensure the surface is slightly rough to improve adhesion of the clear coat.
These techniques help you apply carbon fiber overlays effectively, ensuring a flawless and durable result.
Trimming and Sealing
Trim excess material for a clean edge.
After applying the carbon fiber overlay, trimming the excess material ensures a polished and professional look. Start by using an exacto knife to carefully cut around holes or openings, such as door handles or emblem spaces. For edges, trim the material slightly beyond the bottom edge of the panel. This technique creates a curved, molded appearance that blends seamlessly with the car’s surface.
For larger areas, begin with a Dremel tool equipped with a routing bit. Maintain a 1/2-inch margin from the edge to avoid cutting too close. Once the rough trimming is complete, switch to flat files for straight edges and round files for corners. File gently until you reach the original edge of the panel. To finish, hand sand the trimmed areas with 400-grit sandpaper. This step smooths any roughness and prepares the edges for sealing.
Tip: Always work slowly and use sharp tools to avoid tearing the vinyl. A steady hand ensures clean cuts and a flawless finish.
Apply a sealant to enhance durability and water resistance.
Sealing the carbon fiber overlay is the final step in the installation process. A high-quality sealant not only improves the overlay’s appearance but also provides long-term protection against water and environmental damage. Apply the sealant evenly across the surface using a microfiber cloth or sponge. Focus on edges and corners, as these areas are more prone to peeling or water infiltration.
Allow the sealant to cure for the recommended time specified by the manufacturer. This curing process strengthens the bond between the overlay and the car’s surface, ensuring maximum durability. A properly sealed overlay offers excellent protection against UV rays, moisture, and wear, keeping your car looking sleek and well-maintained for years.
By following these steps, you can achieve a clean, professional finish while enhancing the overlay’s water resistance and overall protection.
Tips for a Professional Finish with Carbon Fibre Decals
Avoiding Bubbles and Wrinkles
Achieving a smooth finish with carbon fibre decals requires careful attention to detail. Work slowly and use a squeegee to smooth the material as you apply it. Start from the center and move outward to push out air bubbles. This technique ensures a wrinkle-free surface.
Heat plays a crucial role in making the vinyl pliable. Use a heat gun or hairdryer to gently warm the material. Moderate heat allows the wrap to conform to curves and edges without damaging it. Avoid overheating, as this can warp or melt the vinyl.
To prevent common mistakes, follow these steps:
-
Clean the surface thoroughly to remove dirt and grease.
-
Take your time during application to avoid misalignment and trapped air bubbles.
-
Avoid overstretching the wrap, which can distort the carbon fiber pattern.
-
Use heat carefully to soften the material without damaging it.
-
Perform a final heating step to ensure proper adhesion and prevent lifting over time.
Ensuring Long-Lasting Durability
Protecting your carbon fibre decals ensures they last longer and maintain their sleek appearance. Apply a sealant after installation to shield the vinyl from water and UV damage. This extra layer of protection enhances durability and prevents fading.
Avoid washing your car for at least 48 hours after installation. This waiting period allows the adhesive and sealant to cure fully, ensuring a strong bond. Once cured, the overlay will resist environmental wear and tear effectively.
Achieving a Seamless Look
Pay close attention to edges and corners during installation. Proper adhesion in these areas prevents peeling and creates a professional finish. Use a precision cutting tool to trim excess material cleanly. Sharp cuts result in a polished look that blends seamlessly with the car’s surface.
For a flawless finish, inspect the overlay after installation. Smooth out any imperfections with a squeegee or by reheating the vinyl. These small adjustments make a big difference in achieving a seamless, high-quality appearance.
Installing water-resistant carbon fiber overlays on your car is a rewarding process. By following these steps—gathering the right tools, preparing the surface, applying the overlay, and sealing it—you can achieve a professional-grade finish.
Tip: Take your time during each step to ensure the best results. Precision and patience make all the difference.
You don’t need to be an expert to transform your car. With proper guidance, you can enhance its appearance and protect it from wear. A sleek, water-resistant carbon fiber finish not only elevates your car’s style but also adds long-lasting durability. Why not give it a try?
Share:
How Carbon Fiber Surrounds Enhance Instrument Panel Design and Functionality
What You Need to Know About Carbon Fiber Structural Tubes