Unlocking the full potential of your Honda engine starts with selecting the right intake manifold. A well-designed manifold improves engine torque by up to 10% and boosts volumetric efficiency by 6% at 3500 rpm, translating to an extra 4.93 horsepower. These gains can significantly enhance your car’s performance, whether you prioritize speed, reliability, or fuel efficiency. Choosing the best intake manifolds for Honda engines ensures smoother airflow and optimized combustion, making it a critical upgrade for any enthusiast looking to elevate their driving experience.
Key Takeaways
-
Picking the right intake manifold can add 5 horsepower and increase torque by 10%.
-
Problems with an intake manifold include coolant leaks, rough idling, and engine warning lights. Replace it if you see these problems.
-
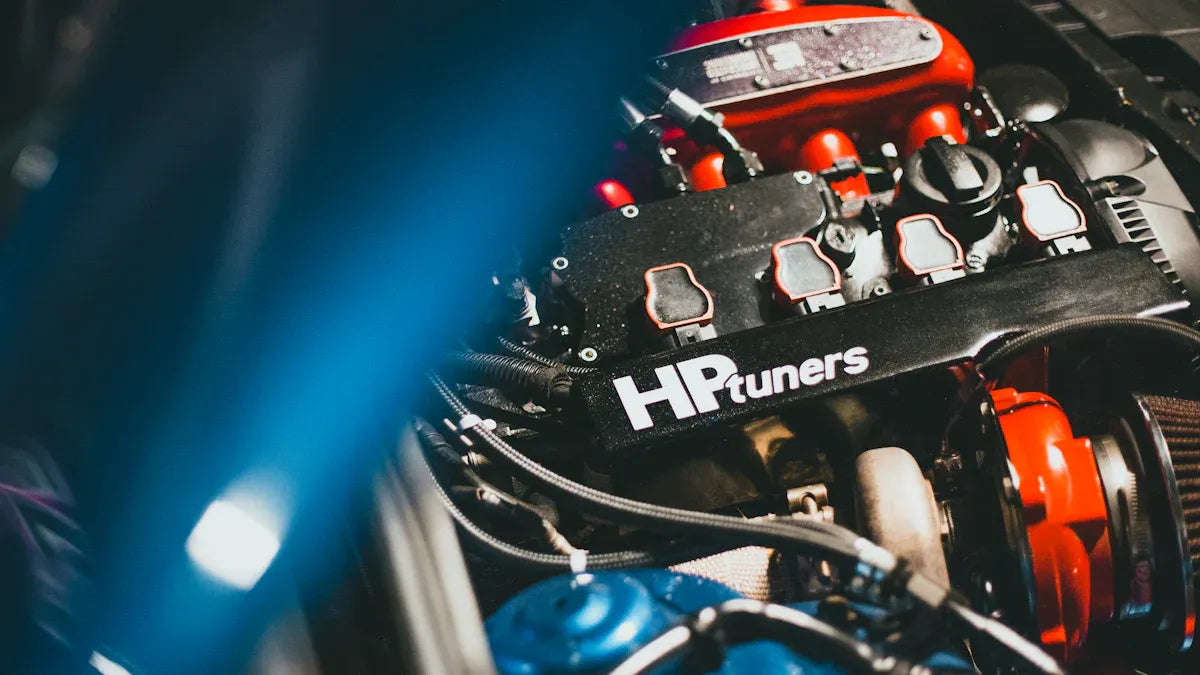
Aftermarket intake manifolds give better airflow and performance than factory ones. They are great for car fans.
-
Check if it works with your engine changes to get the best results and avoid errors.
-
Clean it often and replace gaskets to keep it working well and lasting longer.
Why the Intake Manifold is Crucial for Engine Performance
How the intake manifold impacts airflow and combustion
The intake manifold plays a pivotal role in your engine’s performance by managing airflow and ensuring efficient combustion. Its design directly influences how air enters the cylinders, impacting torque, horsepower, and overall efficiency. Modern manifolds use advanced Computational Fluid Dynamics (CFD) to optimize airflow under dynamic conditions. This ensures that air flows smoothly through the runners and aligns perfectly with the cylinder head ports, maximizing efficiency.
Key design elements like runner length and plenum size significantly affect performance. High-rise manifolds, for instance, allow straighter airflow, boosting power output. Longer runners maintain air inertia, improving cylinder filling and enhancing low-end torque. Research on intake manifold geometry has shown that even minor adjustments can improve volumetric efficiency by over 125%, leading to better air-fuel mixing and combustion. These improvements translate into a high-performance engine that delivers both power and reliability.
Signs your current intake manifold may need an upgrade
An inefficient or failing intake manifold can severely impact your engine’s performance. Common symptoms include:
-
Coolant disappearing from the reservoir without visible leaks.
-
White smoke emitting from the exhaust with a sweet smell.
-
Rough idling or unexpected stalling.
-
Frequent overheating, even during short drives.
-
Check engine lights displaying codes like P0171 or P0300.
These issues often indicate problems like cracks, leaks, or misaligned runners, which disrupt airflow and reduce combustion efficiency. Upgrading to a high-performance intake manifold can resolve these issues, ensuring smoother airflow and optimal engine operation. If you notice any of these signs, consider an upgrade to maintain your vehicle’s performance and reliability.
Best Intake Manifolds for Honda Engines
Comparing OEM and aftermarket options
When choosing the best intake manifolds for Honda engines, you must decide between OEM and aftermarket options. OEM intake manifolds are designed to meet factory specifications, ensuring compatibility and reliability. However, they often lack the performance enhancements that aftermarket options provide.
The table below highlights key differences between the two:
|
Feature |
OEM Intake Manifold |
Aftermarket Intake Manifold |
|---|---|---|
|
Airflow |
Standard airflow |
Increased airflow, optimized EGR flow |
|
Performance Gains |
Minimal performance improvement |
Up to 30 horsepower gains |
|
Efficiency |
Meets basic efficiency requirements |
Enhanced efficiency, less EGR deposits |
|
Tuning Requirement |
Requires tuning |
No tuning required |
|
Construction Material |
Standard materials |
A356, heat treated to T6 |
|
Design |
Factory design, cost-effective |
Designed for maximum performance, less restriction |
|
Compatibility |
Compatible with factory components |
Replaces factory manifold, retains factory components |
If you aim for high-performance intake upgrades, aftermarket options deliver better airflow and significant horsepower gains. However, OEM manifolds remain a cost-effective choice for daily driving or stock setups.
Top-rated intake manifolds for B-series, K-series, and D-series engines
Several intake manifolds stand out for their performance and reliability across Honda engine families. For B-series engines, the Skunk2 Pro Series Intake Manifold is a favorite among enthusiasts. It offers excellent performance gains and features a unique crinkle red finish that complements JDM Civic Type R valve covers.
For K-series engines, the Plazmaman Elite Series Intake Manifold is a top choice. It includes a billet fuel rail and advanced manufacturing techniques, ensuring durability and customization for torque and horsepower needs.
D-series engines benefit from options like the Edelbrock Performer X, which balances performance and affordability. These manifolds are precision-engineered to optimize airflow and enhance engine efficiency, making them ideal for both street and racing applications.
Pros and cons of different materials and designs
The material and design of an intake manifold significantly impact its performance. Aluminum manifolds, such as those made from A356 alloy, are lightweight and durable. They withstand high temperatures and pressures, making them ideal for high-performance intake systems. Plastic manifolds, often found in OEM designs, are lighter but less durable under extreme conditions.
The table below compares various designs and materials:
|
Concept |
E Factor (%) |
Mass Flow Rate Improvement |
|---|---|---|
|
C1 |
13.07 |
Decreased in Inlets 1, 2; increased in Inlet 4 |
|
C2 |
6.27 |
Significant increases across all inlets |
|
C3 |
14.33 |
Improved in Inlets 1, 2; higher non-uniformity |
|
C4 |
N/A |
Enhanced mass flow rate for Inlets 1, 2 |
|
C5 |
N/A |
More uniform flow distribution, significant improvements across all inlets |
High-rise designs improve airflow for racing applications, while shorter runners enhance low-end torque for street use. Selecting the right material and design depends on your performance goals and the type of driving you do.
Key Factors to Consider for an Intake Manifold Upgrade
Performance goals: street use, racing, or daily driving
Your performance goals should guide your intake manifold selection. For street use or daily driving, prioritize manifolds that enhance low-end torque and fuel efficiency. Dual-plane intake designs are ideal for these applications, as they deliver a balance of power and drivability. For racing, single-plane manifolds excel by maximizing airflow at higher RPMs, which translates to peak horsepower gains.
The table below highlights the performance differences between dual-plane and single-plane manifolds:
|
Intake Type |
Peak Horsepower |
Peak Torque |
Torque Below 3,500 RPM |
|---|---|---|---|
|
Dual-Plane |
376 hp |
339 lb-ft |
+50 lb-ft |
|
Single-Plane |
375 hp |
342 lb-ft |
N/A |
If you own a Honda Civic and use it for both daily driving and occasional track days, consider a hybrid manifold design. These manifolds combine features of both dual-plane and single-plane designs, offering versatility without compromising performance.
Budget and cost-effectiveness
An intake manifold upgrade can range from affordable to premium, depending on your budget. OEM manifolds are cost-effective and reliable for stock setups, but they lack the performance enhancements of aftermarket options. Aftermarket manifolds, while pricier, provide significant gains in airflow and horsepower.
When evaluating cost-effectiveness, consider the long-term benefits. A high-quality manifold may reduce maintenance costs by improving engine efficiency and durability. For example, investing in a Skunk2 Pro Series manifold for your Honda Civic can yield up to 30 additional horsepower, making it a worthwhile upgrade for enthusiasts seeking performance gains.
Compatibility with other engine modifications
Your intake manifold must align with your engine’s existing modifications. For instance, if your Honda Civic features a turbocharger, the manifold should support increased air density and mass flow. While a cold air system may flow 1,200 CFM, the engine only utilizes 400 CFM due to air density changes. Focus on mass airflow measurements to ensure compatibility and optimal performance.
Additionally, consider how the manifold integrates with components like fuel injectors, throttle bodies, and exhaust systems. A mismatch can lead to inefficiencies or even damage. Always verify compatibility before committing to an upgrade to avoid unnecessary complications.
Long-term durability and maintenance
When upgrading your Honda’s intake manifold, you must consider its long-term durability and maintenance requirements. A high-quality intake manifold not only enhances performance but also ensures reliability over time. Choosing the right material and design plays a significant role in achieving this balance.
Key Factors for Durability
-
Material Selection: Aluminum intake manifolds, especially those made from A356 alloy, offer excellent durability. They resist warping under high temperatures and pressures, making them ideal for performance applications. Plastic manifolds, while lightweight, may degrade faster under extreme conditions.
-
Corrosion Resistance: Look for manifolds with protective coatings or anodized finishes. These features prevent corrosion and extend the lifespan of the component.
-
Heat Management: Manifolds with integrated heat shields or thermal coatings reduce heat soak, protecting the engine and improving efficiency.
Pro Tip: Regularly inspect your intake manifold for cracks, leaks, or signs of wear. Early detection can prevent costly repairs.
Maintenance Best Practices
-
Routine Cleaning: Carbon deposits and debris can accumulate inside the manifold, restricting airflow. Use a throttle body cleaner or specialized intake cleaner to remove buildup.
-
Gasket Replacement: Always replace the intake manifold gasket during installation or maintenance. A worn gasket can cause air leaks, reducing performance.
-
Torque Specifications: Follow the manufacturer’s torque specifications when tightening bolts. Over-tightening can damage the manifold, while under-tightening may lead to leaks.
Investing in a durable intake manifold and following proper maintenance practices ensures consistent performance and reduces the risk of engine issues. By taking these steps, you can maximize the lifespan of your upgrade and enjoy a smoother driving experience.
Tools and Parts Needed for Installation
Essential tools for the job
Installing a new intake manifold requires the right tools to ensure a smooth and efficient process. Using the correct equipment minimizes the risk of damage to your engine components and ensures proper installation. Below is a table of essential tools and their purposes:
|
Tool |
Purpose |
|---|---|
|
Socket set (including deep sockets) |
Removes manifold bolts. |
|
Torque wrench |
Ensures bolts are tightened to manufacturer specifications. |
|
Ratchet with extensions |
Reaches bolts in tight spaces. |
|
Screwdrivers (flathead and Phillips) |
Removes hose clamps and small fasteners. |
|
Fuel line disconnect tool |
Required for some fuel-injected engines. |
|
Mechanic gloves |
Protects hands from sharp edges and hot surfaces. |
|
Safety glasses |
Prevents debris from getting into your eyes. |
|
Gasket scraper or plastic razor blade |
Cleans old gasket residue from the engine. |
|
Thread locker (if required) |
Prevents bolts from loosening over time. |
|
Coolant (if draining the system) |
Refills the cooling system if the manifold has coolant passages. |
Having these tools ready before starting the installation will save you time and effort.
Additional parts like gaskets, bolts, and sensors
Replacing certain parts during the installation process ensures optimal performance and longevity. High-quality gaskets, bolts, and sensors are critical for maintaining a proper seal and preventing leaks. Here are some key considerations:
-
Gaskets: Always use a new intake manifold gasket. Multi-layer-steel (MLS) gaskets are highly effective at maintaining a seal under varying conditions.
-
Bolts: Proper torque settings are crucial. Insufficient torque can cause vibration and loosening, while excessive torque risks damaging threads and components.
-
Sensors: Inspect and replace any worn or damaged sensors to ensure accurate readings and efficient engine operation.
Investing in quality parts reduces the risk of future failures and enhances the overall performance of your engine.
Preparing your workspace for a smooth installation
A well-organized workspace is essential for a successful intake manifold installation. Follow these steps to prepare your area:
-
Clean the workspace: Remove any clutter or debris to create a safe and efficient environment.
-
Gather tools and parts: Lay out all necessary tools and components within easy reach.
-
Ensure proper lighting: Good visibility helps you avoid mistakes during the installation process.
-
Protect the engine bay: Use fender covers or towels to prevent scratches and damage to your vehicle.
-
Drain fluids if necessary: If your manifold has coolant passages, drain the cooling system to avoid spills.
Taking the time to prepare your workspace ensures a smoother installation process and reduces the likelihood of errors.
Step-by-Step Guide to Installing an Intake Manifold
Removing the old intake manifold
Removing the old intake manifold is the first step in the installation process. Begin by disconnecting the battery to prevent electrical hazards. Next, detach all hoses, sensors, and electrical connections attached to the manifold. Labeling these components ensures proper reassembly later. Use a socket set to loosen and remove the manifold bolts. A ratchet with extensions can help access bolts in tight spaces. Once all bolts are removed, carefully lift the manifold off the engine.
Inspect the old manifold for signs of damage or wear, such as cracks or leaks. If coolant passages are present, drain the cooling system to avoid spills. This step prevents contamination and ensures a clean workspace for the new installation.
Pro Tip: Use only the recommended OEM intake gaskets with your new manifold to ensure a proper seal and optimal performance.
Cleaning and preparing the engine surface
Proper cleaning and preparation of the engine surface are critical for a successful installation. Begin by using a gasket scraper or plastic razor blade to remove any old gasket material from the cylinder head flanges and engine block. Avoid using metal tools that could scratch the surfaces. Clean the area with a lint-free cloth and a suitable solvent to remove oil, debris, and carbon deposits.
Studies show that thorough cleaning reduces wear on cylinder walls by up to 89% and improves piston ring durability by 88%. These benefits translate to better engine performance and longevity. Ensure the surface is completely dry before proceeding to the next step.
Note: Do not use sealants or adhesives on the gasket surfaces. A clean, dry surface ensures the best seal.
Installing the new intake manifold
Position the new intake manifold onto the engine block, aligning it with the cylinder head ports. Lightly coat the manifold bolts with 30W motor oil to prevent thread damage. Thread the bolts into place by hand to hold the manifold securely. Do not tighten them yet.
Install the thermostat into its recess, ensuring the o-ring is properly seated. Once all components are in place, tighten the manifold bolts in the specified torque sequence. This step ensures even pressure distribution and prevents leaks. Post-installation tests show that a properly installed manifold improves the power curve and maintains efficiency under heavy loads.
Finally, reconnect all hoses, sensors, and electrical connections. Refill the cooling system if necessary and check for leaks. Start the engine and monitor its performance to ensure everything operates smoothly.
Reconnecting hoses, sensors, and other components
After securing the intake manifold, reconnecting all hoses, sensors, and components is crucial for proper engine operation. Begin by attaching the vacuum hoses to their designated ports. Ensure each hose fits snugly to prevent air leaks. Reconnect the coolant hoses if your manifold includes coolant passages. Double-check that the clamps are tight to avoid leaks during operation.
Next, reinstall the fuel lines. Use a fuel line disconnect tool if necessary and ensure the connections are secure. Reattach the throttle body and connect the throttle cable or electronic throttle control. Verify that the throttle linkage moves freely without obstruction.
For sensors, carefully reconnect the MAP (Manifold Absolute Pressure) sensor, MAF (Mass Air Flow) sensor, and IAC (Idle Air Control) valve. Inspect the wiring harness for any damage before plugging it back in. If your manifold includes an EGR (Exhaust Gas Recirculation) valve, ensure the gasket is intact and the valve is properly seated.
Pro Tip: Labeling hoses and connectors during disassembly simplifies reassembly and reduces the risk of errors.
Finally, reconnect the battery and inspect the engine bay for any loose components or tools. A thorough check ensures everything is in place before testing the system.
Testing and troubleshooting after installation
Testing the system after installation helps identify potential issues and ensures optimal performance. Start by turning the ignition key to the “on” position without starting the engine. Listen for the fuel pump priming and check for any warning lights on the dashboard.
Once the engine starts, monitor its idle speed and listen for unusual noises. Spray carb or brake cleaner around the edges of the intake manifold to check for vacuum leaks. If the engine idle changes, it indicates a leak that needs attention. Perform the same test around the EGR valve, PCV valve, and throttle body.
Inspect the fuel pressure regulator by pulling off the vacuum line. If you notice fuel inside the line, the regulator may need replacement. Disconnect and clean the MAP and MAF sensors using a dedicated cleaner. Test the IAC valve, TPS (Throttle Position Sensor), and other components to ensure they function correctly.
Checklist for Troubleshooting:
Verify the EGR valve and tubes are leak-free.
Check the intake manifold gaskets for proper sealing.
Test and clean sensors like MAP, MAF, and IAC.
Confirm the throttle body operates smoothly.
Addressing these steps ensures your intake manifold upgrade delivers the performance gains you expect. Regular maintenance and inspections will keep your engine running efficiently.
Common Mistakes to Avoid During an Intake Manifold Upgrade
Skipping the cleaning process
Neglecting to clean the engine surface before installing a new intake manifold can lead to significant performance issues. Dirt, debris, and old gasket material left on the surface can prevent a proper seal, causing air or coolant leaks. These leaks disrupt airflow and reduce engine efficiency. Studies show that thorough cleaning can improve fuel efficiency by up to 5% and reduce maintenance issues by 20%.
To avoid this mistake, use a gasket scraper or plastic razor blade to remove old gasket residue. Follow up with a lint-free cloth and a suitable solvent to clean the surface completely. Cover the intake ports immediately after removing the old manifold to prevent debris from falling in. This simple step protects your engine from potential damage and ensures a smooth installation process.
Tip: Always inspect the sealing surfaces for erosion or warping. Use a straightedge to check flatness, ensuring it meets the required tolerance of 0.003 inches for V6 engines.
Over-tightening or under-tightening bolts
Improper bolt torque is a common error that can cause manifold leaks or damage. Over-tightening bolts can strip threads or crack the manifold, while under-tightening may result in poor sealing and air leaks. A study found that 81% of flange leakage accidents were due to incorrect bolt load, highlighting the importance of proper torque application.
Use a torque wrench to tighten bolts to the manufacturer’s specifications. Regularly check your torque tools for accuracy and service them as needed to maintain performance. Lightly coat the bolts with motor oil before installation to ensure smooth threading and consistent clamping force. Following these steps minimizes the risk of errors and ensures a secure fit.
Pro Tip: Tighten bolts in the specified sequence to distribute pressure evenly across the manifold.
Ignoring compatibility issues with other engine parts
Installing an intake manifold without verifying its compatibility with other engine components can lead to inefficiencies or damage. For example, a manifold designed for naturally aspirated engines may not support the increased air density of a turbocharged setup. Similarly, mismatched throttle bodies or fuel injectors can disrupt airflow and fuel delivery, reducing performance.
Before purchasing a manifold, confirm its compatibility with your engine’s modifications. Check the specifications for components like throttle bodies, sensors, and fuel systems. Double-check that the manifold aligns with your performance goals, whether for street use, racing, or daily driving. Taking these precautions ensures optimal performance and prevents costly mistakes.
Note: Always test for leaks and performance issues after installation to verify compatibility and proper operation.
Failing to test for leaks or performance issues
Neglecting to test for leaks or performance issues after installing a new intake manifold can lead to significant problems. Even a minor leak can disrupt airflow, alter the air-fuel mixture, and reduce engine efficiency. These issues often go unnoticed until they cause severe damage or performance degradation. Testing ensures that your manifold operates as intended and prevents costly repairs down the line.
Several effective methods can help you identify leaks and performance issues. The table below outlines these techniques and their importance:
|
Testing Method |
Description |
Importance |
|---|---|---|
|
Visual Inspection |
Finding leaks visually or using tools to pressurize the system. |
Essential for identifying leaks in various components, including gaskets and seals. |
|
Smoke Machine |
Diagnoses multiple leaks by pressurizing the intake manifold with smoke. |
Allows for quick identification of air leaks that affect fuel mixture and engine performance. |
|
Pressure Testing |
Uses pressure testers to detect leaks, especially in head gaskets. |
Critical for ensuring the integrity of the engine and preventing performance issues. |
You should begin with a visual inspection. Look for signs of oil, coolant, or air escaping around the manifold. A smoke machine can then help pinpoint hidden leaks by filling the system with smoke under pressure. This method is particularly effective for detecting small air leaks that might otherwise go unnoticed. Finally, pressure testing ensures the manifold and related components maintain proper sealing under operating conditions.
Skipping these tests can result in poor engine performance, reduced fuel efficiency, and even long-term damage. By taking the time to test for leaks and performance issues, you ensure that your intake manifold upgrade delivers the expected benefits. This step is not just a precaution—it is essential for maintaining your engine’s health and maximizing its potential.
Upgrading your intake manifold is one of the most effective ways to enhance your Honda engine’s performance. Whether you aim to boost high-end power or improve throttle response, the right manifold can transform your driving experience. For example, the RRC manifold delivers peak power for K-Series engines, while the RSP manifold offers similar results at a lower cost when paired with T7Design trumpets. Users frequently report smoother acceleration and optimized airflow dynamics, making daily driving more exhilarating.
When selecting an intake manifold, consider your engine type, performance goals, and budget. Follow the installation steps carefully to avoid common mistakes like improper torque or compatibility issues. By taking these steps, you can unlock your Honda’s full potential and enjoy a more responsive, powerful engine. Start your upgrade today and experience the difference firsthand.
Share:
Top Aesthetic Upgrades for Subaru WRX in 2025
Easy Steps to Keep Your Car Dashboard Spotless